How to care and clean the Microwave Oven. - NN-DS58
- How to Clean the Combination Microwave Oven.
- Deodorization Setting.
- Drain Water Setting.
- System Cleaning.
- How to clean the Water Tank.
How to Clean the Combination Microwave Oven
Please see below and the following for particular cleaning instructions for each section of the oven.Before cleaning, unplug oven at wall outlet. If outlet is inaccessible, leave oven door open while cleaning.
After cleaning: Press [Stop/Reset] to clear the Display.
- Outside oven surfaces: Clean with a damp cloth. To prevent damage to the operating parts inside the oven, water should not be allowed to seep into ventilation openings.
- Label: Do not remove. Wipe with a damp cloth.
- Upper heater: Clean the upper heater after it is completely cold. Wipe with a soft and damp cloth carefully to avoid breaking the heater and hurting your fingers by the broken heater.
- Flat table: Always clean the flat table after cooling down with a mild detergent and wipe to dry.
- Control Panel: Do not allow the Control Panel to become wet. Clean with a soft, damp cloth. Do not use detergents, abrasives or spray-on cleaners on the Control Panel. When cleaning the Control Panel, leave oven door open to prevent oven from accidentally turning on. After cleaning press [Stop/Reset] pad to clear display window.
- Inside the Oven: Wipe with a damp cloth after using. Mild detergent may be used if needed. Do not use harsh detergents or abrasives.
- Oven Door: Wipe with a soft dry cloth when steam accumulates inside or around the outside of the oven door. During cooking, especially under high humidity conditions, steam is given off from the food. (Some steam will condense on cooler surfaces, such as the oven door. This is normal.)
- Wire Rack and Grill Tray: After using, clean it with a mild detergent or dishwasher.
- Drip Tray: Always keep the drip tray clean. Clean and wipe dry after use. After cleaning, re-connect the drip tray to the plastic feet. Do not use a dishwasher to clean the drip tray.
Notes
- When using the Grill, Oven or cooking in the Combination (Crispy Grill/Combo 1/Combo 2) modes, some foods may inevitably splatter grease on to the oven walls. If the oven is not cleaned, occasionally it may start to "smoke" during use. These marks will be more difficult to clean later.
- After Grill, Oven, Combination (Crispy Grill/Combo 1/Combo 2) cooking, the ceiling and walls of the oven should be cleaned with a soft cloth squeezed in soapy water. Particular care should be taken to keep the window area clean, particularly after cooking by Grill, Oven or Combination (Crispy Grill/Combo 1/Combo 2). Stubborn spots inside the oven can be removed by using a small amount of microwave oven cleaner sprayed onto a soft damp cloth. Wipe on to problem spots, leave for recommended time and then wipe off. This method can not be used to clean the oven door. Do not spray directly inside the oven. A steam cleaner is not to be used for cleaning. Failure to maintain the oven in a clean condition could lead to deterioration of the surface that could adversely affect the life of the appliance and possibly result in a hazardous situation.
- Do not use harsh abrasive cleaners or sharp metal scrapers to clean the oven door glass since they can scratch the surface, which may result in shattering of the glass.
- When it becomes necessary to replace the oven light, please consult the service center specified by Panasonic.
Deodorization Setting
This feature is suitable for cleaning the particular smell from the microwave oven (20 minutes is needed).- Press [Auto] 10 times.
- Press [Start] once.
The cooking time appears in the display window and begins to
count down.
Drain Water Setting
Water is pumped through the system to clean the pipes. The water is drained into the drip tray.- Add 3 oz. (100 ml) of water to the water tank. Ensure drip
tray is empty.
- Press [Auto] 11 times.

- Press [Start] once.
Empty the drip tray after the program has finished.

Notes:
- Only run this program with 3 oz. (100 ml) of water in the tank.
- Do not remove the drip tray during the drain water program.
- Empty the drip tray and rinse with running water after the program has finished.
System Cleaning
The first stage of this program cleans the system with a citric acid solution. The second stage runs water through the system to rinse the pipes.- Make a solution of 16 g citric acid and ¾ cups (200 g) of
water. Add the solution to the water tank. Ensure drip tray is
empty.
- Press [Auto] 12 times.

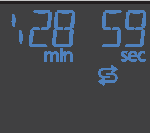
- Press [Start] once. The program will run
for approx. 29 minutes.
- After the program has paused, empty the drip tray and fill
the water tank with water (to max level).
- Press [Start] once.
The program will run for approx. 1 minute. Empty the drip tray
after the program has finished.

Notes:
- Fill the water tank before use.
- When "
 "
appears in the display, run the system cleaning program.
"
appears in the display, run the system cleaning program. - If the system cleaning program is not used regularly, the pipe will get blocked and the steaming performance will be less effective.
- Do not remove the drip tray during the drain program.
- Empty the drip tray and rinse with running tap water after the program has finished.
Cavity Cleaning
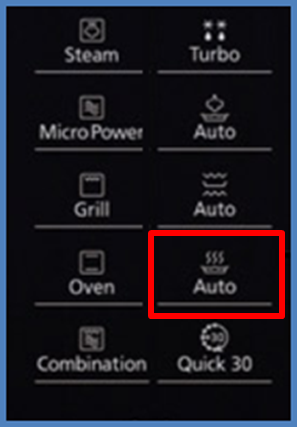
This feature is available when the cavity is built up with fat or grease (20 minutes is needed).- Press [Auto] 13 times.

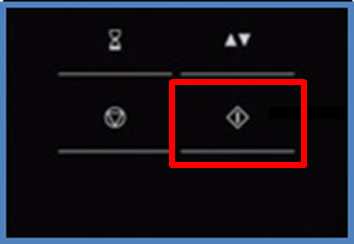
- Press [Start] once.
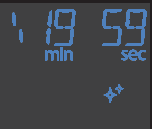
The cooking time appears in the display window and begins to
count down.
Notes:
- Fill the water tank before use.
- After cleaning, open the door and wipe with a damp cloth.
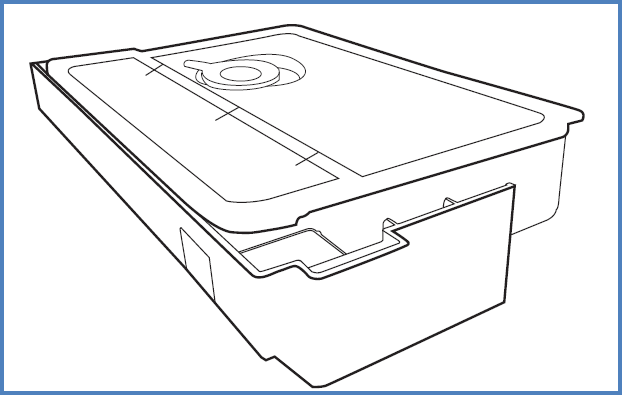
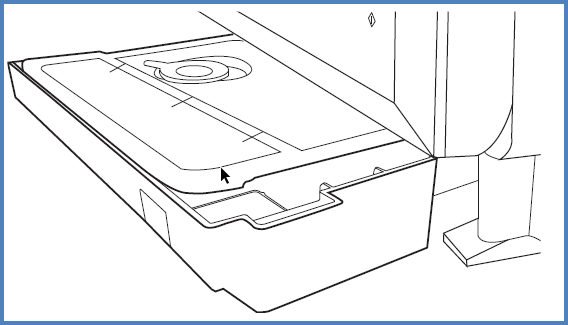
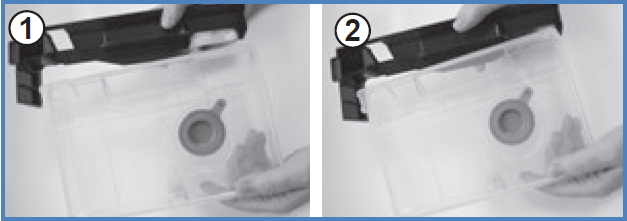
How to clean the Water Tank
Clean with a soft sponge in water.
- Remove the water tank and clean the compartment where the
water tank is inserted.
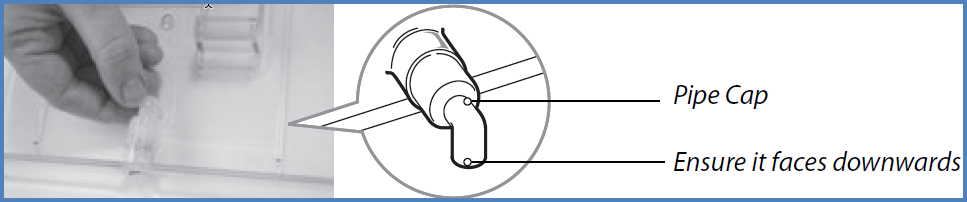
- Open the water supply cap, remove the lid and pipe cap and
clean.

- If the pipe cap is difficlult to remove, wiggle from side
to side. When re-fitting, make sure that the pipe faces
down.
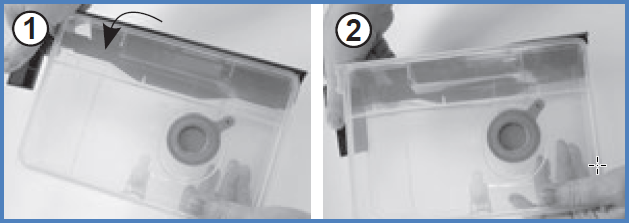
- Lightly twist the cover until the far side unclips.
- Continue to twist until the near side unclips.
- Align the slots on the cover with the holes on the tank.
- Insert and push down until it clicks.
Notes:
- Clean the water tank at least once a week to prevent build up of limescale.
- Do not use a dishwasher to clean the water tank or parts of the water tank.