How to manually record camera images with the Homehawk App.
You can record camera images while viewing live camera images.
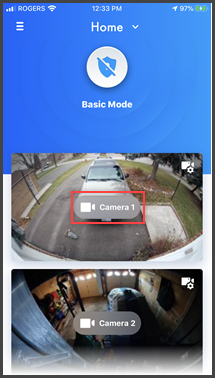
- From the HomeHawk app. homescreen, tap the camera that you
want to record live images from.
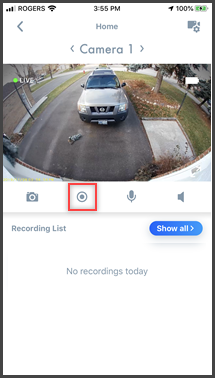
- Press the grey record icon to begin recording.
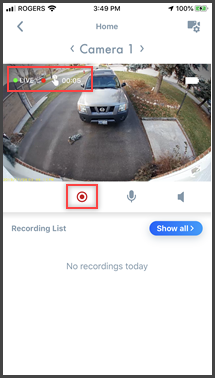
- The recording time is shown in the top left of the screen.
Tap the red record icon to stop recording.
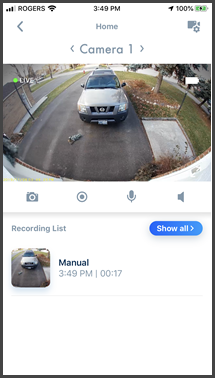
- The recording is added to the Recording List.
Note: Shelf Camera or Floor Camera
- Camera recordings are saved on the camera's micro SD card.
- The maximum recording time is 15 minutes.
- If [Recording Error (Memory full)] is displayed, the camera’s SD card is full and new recordings cannot be saved. Erase unneeded recordings.
Note: Outdoor or Front door camera
- Camera recordings are saved on the access point’s micro SD card.
- The maximum recording time is 2 minutes.
- If [Recording Error (Memory full)] is displayed, the access point’s SD card is full and new recordings cannot be saved. Erase unneeded recordings
Note: WINDOW Camera
- Camera recordings are saved on the camera's micro SD card.
- Manual recording is not available when 24/7 MODE is used.
- The maximum recording time is 5 minutes.
- If [Recording Error (Memory full)] is displayed, the camera’s SD card is full and new recordings cannot be saved. Erase unneeded recordings.
Screenshots shown in this answer are from an iPhone, using the HomeHawk App ver. 3.1.
If you are using a lower version please update the app. through the App store.
To use with an Android device use App ver. 2.7 and higher.
Information applies to all compatible smart devices.
Settings and options may vary by camera.
Screen shots may change by app version.
This answer applies to models, KX-HN1007, KX-HN7001, KX-HN7002, KX-HN7003, KX-HN7051, KX-HN7052, KX-HNC500, KX-HNC505, KX-HNC710, KX-HNC715, KX-HNC800, KX-HNC805, KX-HN1003