How to register additional Android cell phones / smart devices to the access point.
In order to access the access point and its connected devices from a mobile device, you must first register the mobile device to the access point. You can register up to 8 mobile devices to an access point.
Confirm the following before you begin.
- Make sure you have completed the initial setup procedure. Refer to "Initial Setup of the HomeHawk App".
- Make sure your mobile device can connect to the Internet.
- Make sure your wireless router and the access point are turned on.
- Make sure your mobile device and the access point are connected to the same wireless router.
Screen shots in this guide are from an Android Smart Phone
- Using the mobile device that you want to register,
download the HomeHawk app and then start the
app.

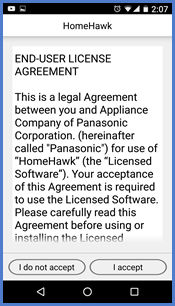
- The end-user license agreement is displayed the
first time you start the app.
- The end-user license agreement is displayed the
first time you start the app.
- Follow the on-screen instructions.
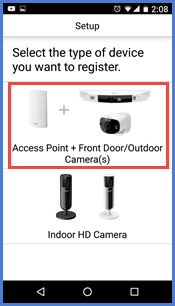
- Tap [ Access Point +
Front Door/Outdoor Camera(s) ] wait for a
while, and then follow the on-screen instructions.
- Tap the LED color that is displayed on the access
point.
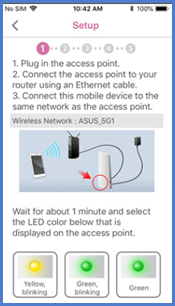
- If the access point’s LED indicator lights in green, tap the green lit button, and then go to step 4.
- If the access point’s LED indicator blinks in amber, tap the amber blinking button, and then connect the Ethernet cable between the access point and router. Next, follow the on-screen instructions, wait for a while, and then check the color of the LED lights again.
- If the access point’s LED indicator blinks in green, tap the blinking green button, check if DHCP (Dynamic Host Configuration Protocol) is operating for the router (refer to the operating instructions included with your router or contact your Internet service provider), and then tap [OK].
- When prompted, press the "SETUP" button on the access
point.
- When prompted, enter the password used to log in to the
access point and then tap [OK].

- When prompted, enter a name for your mobile device and then
tap [OK].
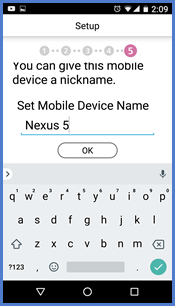
- The mobile device name
setting is used by the access point and other system users
to identify your mobile device. This is useful when
performing certain operations, such as deregistering.
- The mobile device name
setting is used by the access point and other system users
to identify your mobile device. This is useful when
performing certain operations, such as deregistering.
- Follow the on-screen
instructions and tap [ Next ] then [ OK ].

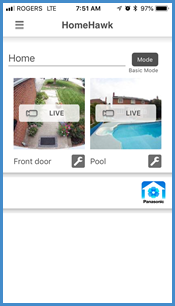
- The app’s home screen is displayed when initial setup is
completed.
Note: For privacy, we recommend that you deregister your mobile device from the access point (Deregistering mobile devices) before handing it over to a third party (such as when submitting your mobile device for service, lending it to someone else, selling it, etc.), or if you no longer intend to use the mobile device with the access point.
Note: Homehawk App screenshots will vary by smart device and app. versions. Version shown i-phone 2.6
This answer applies to models, KX-HN1007, KX-HN7001, KX-HN7002, KX-HN7003, KX-HN7051, KX-HN7052, KX-HNC710, KX-HNC715