


How to set up the telephone's date and time.
The Date and time is automatically displayed by signals that it receives from your telephone provider. However if for some reason, (i.e. not connected to a telephone line) you can manually set the date and time.
The following programming applies to most Panasonic Telephone models designed since 2005. If this procedure does not work for your model Refer to your models Operating Manual for specific procedure.
Examples of Menu Button Location
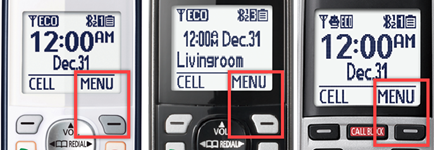
Using the handset:
- Press [ MENU # 1 0 1].
- Enter the date in the order month/date/year using two digits for each, then press [OK].
- Now enter the hour and minute using two digits for each.
- Press the asterics
 button to select between AM/PM. (On some models
press the top right soft key marked as AM/PM).
button to select between AM/PM. (On some models
press the top right soft key marked as AM/PM). - Press [SAVE] or [OFF].
Programming for units that have a keypad on the base, using the Base unit
- Press [MENU # 1 0 1].
- Enter the date in the order month/date/year using two digits for each, then press [OK].
- Now enter the hour and minute using two digits for each.
- Press the [AM/PM] button to select between AM and PM.
- Base unit press [EXIT] or [OFF].
Video example of date and time programming, buttons and displays vary by model.
Model shown is KX-TGD59x series.