How to setup the HomeHawk motion detection notifications and recordings when motion is detected. - HomeHawk outdoor and front door cameras.
Security modes allow the access point and their connected front door cameras and outdoor cameras to operate according to pre-determined settings when an event occurs such as when motion is detected.
The same mode is used for all front door cameras and outdoor cameras connected to the same access point.
You can use preset modes, or create your own modes.
Each mode answers the following questions.
- Which cameras record images and for how long?
- Are cameras combined together for pre-recording?
- Example: 2 cameras can be linked together so that if 1 camera detects motion the other camera starts pre-recording. (Images are temporarily stored, and if motion is detected later, images are then saved on the access point’s SD card.)
- Are notifications sent to mobile devices when motion is detected?
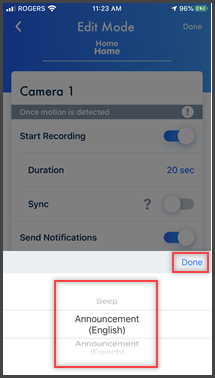
- What sounds are made? – Example: Beeps, announcements, etc.
Here are some examples of how you can use modes.
I want to know when a package arrives
- Which cameras: Camera 1 and Camera 2 record images for 1 minute
- Are cameras combined: Yes
- Are notifications sent: Yes
- What sounds: No sounds are made.
I want to sound a voice alert if a person approaches my front door
- What sounds: An announcement is played
- Which cameras: Camera 1 and Camera 2 record images for 2 minutes
- Are cameras combined: Yes
- Are notifications sent: Yes
How to select a Security Mode.
- Tap the Security mode icon on the HomeHawk™ app main
page.
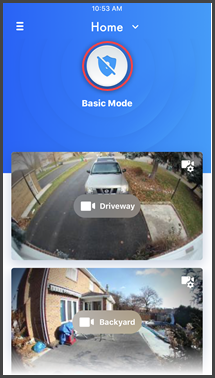
- The current security mode settings are displayed. Tap the
security mode you would like to set.

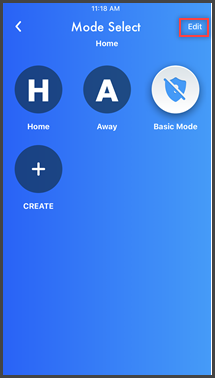
How to edit a Security Mode.
- Tap [ Edit ] then
tap the edit icon on the security mode that you would like to
edit.
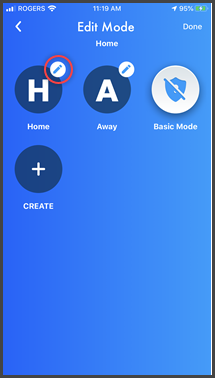
- All of the HomeHawk outdoor and front door cameras that are
connected are listed. For each security mode, settings on
how each camera should react has to be set.

- Edit the desired settings for each camera.
Setting Options
-
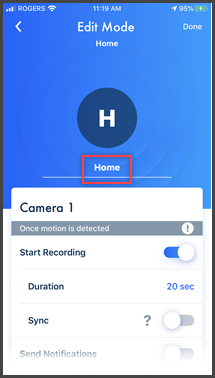
Change the Mode Name. - Tape
the Name, then use the phone's keypad to change the
name.
-
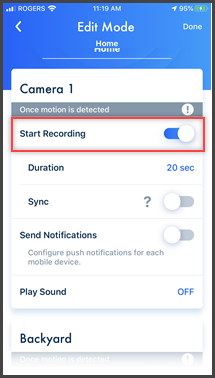
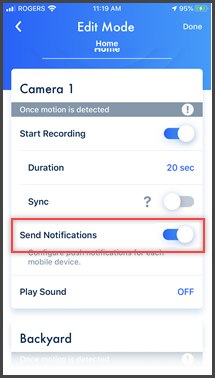
Record & Recording
Time - Select the length of time to record when motion
is detected or turn the recording option ON/OFF.
Note: If motion is continued more than the recording set time, the recording will continue until motion is not detected anymore.
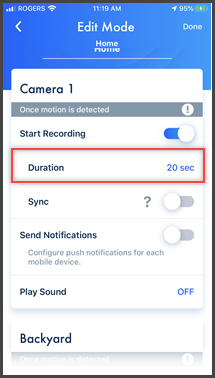
- To set the camera to record, confirm that [ Start Recording ] is set to on, (icon is blue),
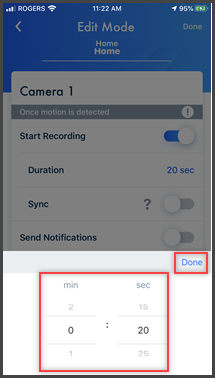
- Tap the time setting next to "Duration"
- Then select the desired recording time.
- Tap [ Done ] to exit.
-
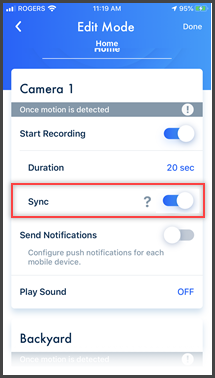
Sync - You can
coordinate cameras so that when 1 camera detects motion the
other camera starts pre-recording. (Images are temporarily
stored, and if motion is detected later, images are then
saved on the access point’s SD card.)
Note: If 3 or more cameras are registered, select which cameras to enable or disable coordination for.
Note: Multi camera is only available when 2 or more cameras are registered to the access point.
- To turn Sync on, tap the "Sync" ON/OFF icon to set.
(Sync is on when icon is blue)
- To turn Sync on, tap the "Sync" ON/OFF icon to set.
(Sync is on when icon is blue)
-
Send Notification -
Tap the "Send Notification" ON/OFF
icon to set whether you want notification to be received on
your cell phone when motion is detected. (Send is on when
icon is blue)
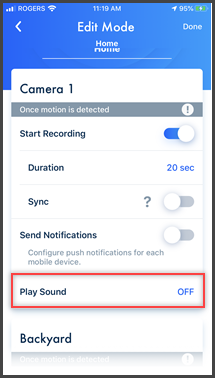
-
Play Sound - Select a
sound to play when motion is detected.
- Tap the setting next to "Play Sound"
- Then select the desired sound setting.
- Tap [ Done ] to
exit.
- Continue to set the above settings for all the connnected cameras. When finished, tap [ Done ].
How to Create a New Mode
- Tap the [ CREATE ] icon (when in the
"Mode Select" screen).
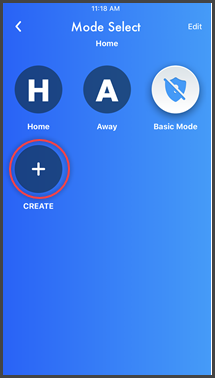
- Name the mode and select the desired settings.
Screenshots shown in this answer are from an iPhone, using the HomeHawk App ver. 3.1.
If you are using a lower version please update the app. through the App store.
To use with an Android device use App ver. 2.7 and higher.
Information applies to all compatible smart devices.
Settings and options may vary by camera.
Screen shots may change by app version.
This answer applies to models, KX-HN1007, KX-HN7001, KX-HN7002, KX-HN7003, KX-HN7051, KX-HN7052, KX-HNC710, KX-HNC715