>
How to use food processor
How to use food processor
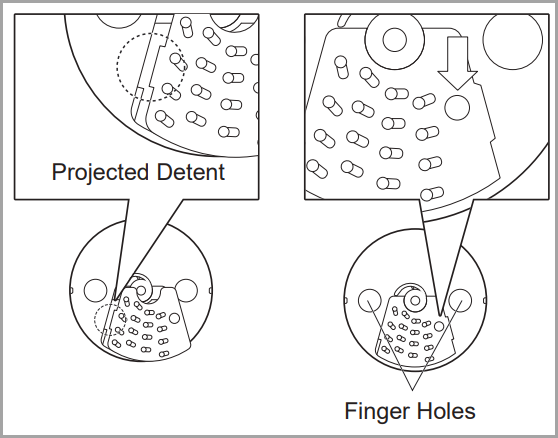
- Fit the projected detent of the desired blade onto the blade stand and ensure it is seated properly. Push down on the dimple on the blade as seen above until a ‘snap’ sound is heard.
 Note:
Note:
- Beware of the sharp edges on the blades while inserting into the blade stand.
- To remove the blade, turn over the blade stand and push down on the reverse side of the dimple on the blade.
-
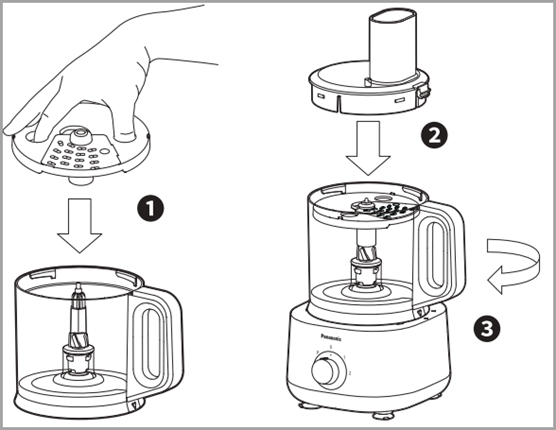 Insert finger and thumb into the finger holes to grip the blade stand. Place the assembled blade stand into the bowl. Attach the bowl to the motor housing as seen in page EN10, then place the blade stand into the bowl.
- Place the bowl lid on top of the bowl.
- Turn it clockwise until a ‘click’ sound is heard. Note: Ensure that the drive shaft is protruding from the blade stand after insertion.
-
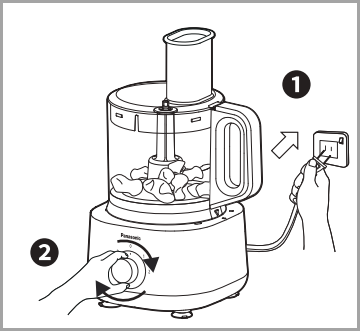
 Plug-in the plug into the socket.
- Turn the rotary switch to select the speed required (Refer to the “Ingredient Preparations” at page EN11 - EN12).
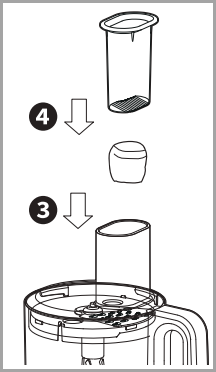
- Insert the ingredients into the feeding tube.
- Push down with the food pusher. Note:
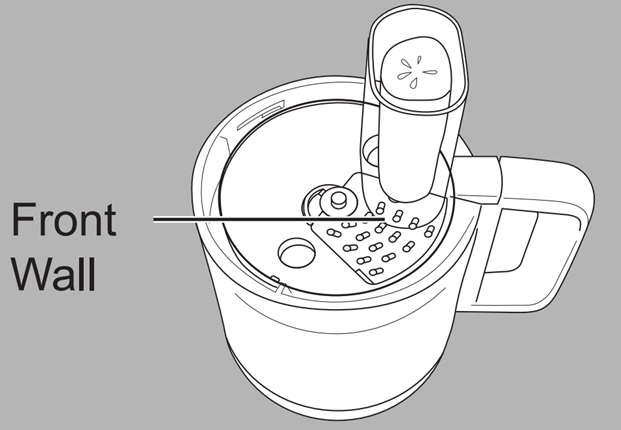
- When using long and narrow ingredients, place it against the front wall of the feeding tube as indicated in Figure 1, for support while in operation to avoid uneven processing.
- Dispose of any remaining lumps of unprocessed ingredients.
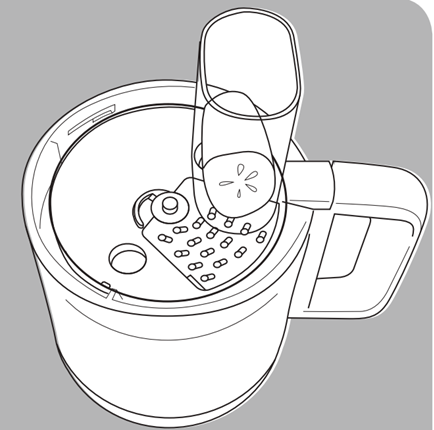
- Align high fiber ingredients as indicated in Figure 2 for a consistent processing result.
-
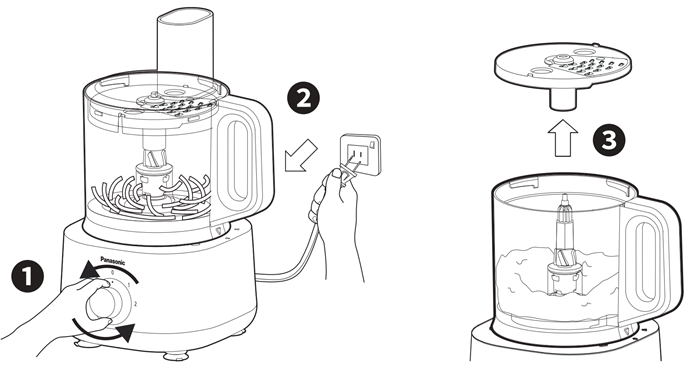 After the processing is completed, return the rotary switch to OFF position ‘0’ .
- Unplug from the socket.
- Remove the blade stand from the bowl before removing the processed ingredients.