How to use the Sensor/Auto Cook feature on the microwave oven.
The Auto or Sensor Cook Features is feature that simplifies programming. It uses built-in sensor technology to sense steam to cook automatically - with no need to set the power level, food weight or cooking time.
Most Panasonic microwaves use this Auto/Sensor Cook setting method:
- Press [Auto Cook] until the number corresponding to the food Menu appears in the display Refer to your Operating Instructions for your models Auto/Sensor Cook Chart.

Image varies by model.
- To select food weight press [Serving/Weight].

Image varies by model.
- Press [Start].
- Cooking is complete when five beeps sound.

Image varies by model.
- Cooking is complete when five beeps sound.
Notes:
- After having used the Auto Cook feature a few times, you may decide you would prefer your food cooked to a different doneness - that is why you would utilize the More/Less pads.
- For Steam combination models Use the +/- pads.
- Automatic features are provided for your convenience. If results are not suitable to your individual preference, or if your serving size is other than what is listed in the chart, please refer to manual cooking in the operating instructions for your model.
- BEFORE Reheating/Cooking: Cover food with lid, or with vented plastic wrap. Never use tightly sealed plastic containers - they can prevent steam from escaping and cause food to overcook.
- After Reheating/Cooking: All foods should have a standing time.
For model specific instructions select a model from the list below. If a model is not listed refer to the operating instructions.
Model NN-CD65NS
- To allow auto program operation, ensure the oven is in Clock mode. Select a menu option by turning the [Defrost/Auto Cook] dial until the number corresponding to the food menu appears in the display Refer to your Operating Instructions for your models Auto/Sensor Cook Chart.
- Press [Start/Select] dial to confirm the program.
- Press dial to Start. The food category will be repeated in the display window until the oven calculates the cooking time after detecting a burst of steam. Do not open the oven door until the remaining cooking time appears in the display window.
- Within 10 seconds, "MORE/LESS“ will scroll through the display and you can adjust with more or less cooking time by turning the dial. After 10 seconds, Sensor will keep displaying in the window till the oven calculates the cooking time after detecting a burst of steam. Then the remaining time will display and count down starts.
Notes:
- Optional press [More/Less] to adjust. Turn dial to add or subtract the cooking time (3 levels can be select), after turning the dial within 14 seconds.
- After having used the Sensor Cook feature a few times, you may decide you would prefer your food cooked to a different doneness – that is why you would like to turning the dial.
- When steam is detected by the Genius Sensor and two beeps sound, the remaining cooking time will appear in the display.
- Automatic features are provided for your convenience. If results are not suitable to your individual preference, or if serving size is other than what is listed in next page, please refer to manual cooking in the operating instructions on page 25.
- If the temperature of the cavity is too high, Sensor Cook feature cannot be used. The message “HOT INSIDE WAIT” will appears in the display window. Sensor Cook feature can be used again when the “HOT INSIDE WAIT” message disappears. Please open the door in order to cool the temperature of the cavity more quickly.
For the best results with the GENIUS SENSOR, follow these recommendations:
BEFORE Reheating/Cooking:
- The room temperature surrounding the oven should be below 95 °F (35 °C).
- Food weight should exceed 4 oz. (110 g).
- Be sure the glass tray, the outside of the cooking containers and the inside of the microwave oven are dry before placing food in the oven. Residual beads of moisture turning into steam can mislead the sensor.
- Cover food with lid, or with vented plastic wrap. Never use tightly sealed plastic containers—they can prevent steam from escaping and cause food to overcook.
DURING Reheating/Cooking:
DO NOT open the oven door until two beeps sound and cooking time appears in the display. Doing so will cause inaccurate cooking since the steam from food is no longer contained within the oven cavity. Once the cooking time begins to count down, the oven door may be opened to stir, turn or rearrange foods.
AFTER Reheating/Cooking:
All foods should have a standing time.
Model NN-CD66NS
Model NN-CD87K
- To allow auto program operation, ensure the oven is in Clock mode. Select a menu option by turning the [Defrost/Auto Cook] dial until the number corresponding to the food menu appears in the display Refer to your Operating Instructions for your models Auto/Sensor Cook Chart.
- Press [Start/Select] dial to confirm the program.
- Press dial to Start. The food category will be repeated in the display window until the oven calculates the cooking time after detecting a burst of steam. Do not open the oven door until the remaining cooking time appears in the display window.
Notes:
- Optional press [More/Less] to adjust. Turn dial to add or subtract the cooking time (3 levels can be select), after turning the dial within 14 seconds.
- After having used the Sensor Cook feature a few times, you may decide you would prefer your food cooked to a different doneness – that is why you would like to turning the dial.
- When steam is detected by the Genius Sensor and two beeps sound, the remaining cooking time will appear in the display.
- Automatic features are provided for your convenience. If results are not suitable to your individual preference, or if serving size is other than what is listed in next page, please refer to manual cooking in the operating instructions on page 25.
- If the temperature of the cavity is too high, Sensor Cook feature cannot be used. The message “HOT INSIDE WAIT” will appears in the display window. Sensor Cook feature can be used again when the “HOT INSIDE WAIT” message disappears. Please open the door in order to cool the temperature of the cavity more quickly.
For the best results with the GENIUS SENSOR, follow these recommendations:
BEFORE Reheating/Cooking:
- The room temperature surrounding the oven should be below 95 °F (35 °C).
- Food weight should exceed 4 oz. (110 g).
- Be sure the glass tray, the outside of the cooking containers and the inside of the microwave oven are dry before placing food in the oven. Residual beads of moisture turning into steam can mislead the sensor.
- Cover food with lid, or with vented plastic wrap. Never use tightly sealed plastic containers—they can prevent steam from escaping and cause food to overcook.
DURING Reheating/Cooking:
DO NOT open the oven door until two beeps sound and cooking time appears in the display. Doing so will cause inaccurate cooking since the steam from food is no longer contained within the oven cavity. Once the cooking time begins to count down, the oven door may be opened to stir, turn or rearrange foods.
AFTER Reheating/Cooking:
All foods should have a standing time.
Model NN-CD989
Model NN-CF876
This feature allows you to cook most of your favourite foods by setting the weight only. The oven determines the power setting, then the cooking time automatically. Select the category of food and then just enter the weight. Do not include the weight of any added water or the container weight. For best results, some menu need preheat oven before cooking.
Auto Cook
- Press [
 ].
]. - Select the auto menu using the [-/+] slider bar.
Refer to your Operating Instructions for your models Auto Cook Chart. - Press [ ] to confirm Menu selection.
Image varies by model.
- Select the weight using the [-/+] slider bar.
- Press [
 (Start)].
- Cooking starts for Menu selections 1-7, 10-11. For Menu Selection 8-9 "Preheat" will scroll across the display window once then a "P" will appear in the display window. When preheating is completed, the oven will beep and "P END" will display in the display window. Then open the door and place the food inside.
Notes:
- When you select an automatic program symbols will appear in the display to show the cooking mode that will be used and the accessories that are needed.
- Most foods benefit from a STANDING time after cooking on an auto program, to allow heat to continue conducting to the centre.
- If the temperature of the cavity is high, auto cook feature can not be used. Display window will display "HOT". auto cook feature can not be used until the "HOT" disappears.
- To allow for some variations that occur in food, check that food is thoroughly cooked and piping hot before serving.
- For some menus, oven will beep to ask you stir or turn over the food during the cooking.
Sensor Cook
This sensor feature allows you to cook food without setting time. The oven simplifies programming. For Menu 14-32 is Sensor Reheat/Cook feature.
- Press [
 ].
]. - Select the auto menu using the [-/+] slider bar.
Refer to your Operating Instructions for your models Sensor Cook Chart. - Press
 to adjust the preferences for food doneness which varies with each individual (optional). After having used the Sensor Reheat/Cook feature a few times, you may decide you would prefer your food cooked to a different doneness.
tap once = More (Adds approx. 20% time)
tap twice = Less (Subtracts approx. 20% time)
tap 3 times = Original setting
Touch More/Less pad before touching Start. - Press [ (Start)] .
- Cooking is complete when 5 beeps sound. (For some menus, when steam is detected by the Genius Sensor and 2 beeps sound, the remaining cooking time will appear in the display window.)
Notes:
For the best results with the GENIUS SENSOR, follow these recommendations. BEFORE Reheating/Cooking:
- The room temperature surrounding the oven should be below 35 °C (95 °F).
- Food weight should exceed 110 g (4 oz.).
- Be sure the flat table, the outside of the cooking containers and the inside of the microwave oven are dry before plac ing food in the oven. Residual beads of moisture turning into steam can mislead the sensor.
- Cover food with lid, or with vented plastic wrap. Never use tightly sealed plastic containers they can prevent steam from escaping and cause food to overcook.
- If the temperature of the cavity is high, sensor cook/reheat feature can not be used. Display window will display "HOT". Sensor Reheat/Cook feature can not be used until the "HOT" disappears.
- When you select an automatic program, symbols will appear in the display window to show the cooking mode that will be used and the accessories that are needed.
DURING Reheating/Cooking:
DO NOT open the oven door until beeps sound. Doing so will cause inaccurate cooking since the steam from food is no longer contained within the oven cavity. Once the cooking time begins to count down, the oven door may be opened to stir, turn or rearrange foods for some menus.
AFTER Reheating/Cooking:
All foods should have a stand time.
Model NN-CS597
- Rotate the [Menu/Temperature] dial clockwise until the number corresponding to the food menu appears in the display Refer to your Operating Instructions for your models Microwave Auto Menu Feature.
- Rotate [Time/Serving/Weight] dial to set serving or weight.
- Press [Timer/Clock(More/Less)] to adjust the cooking time for a larger or shorter time. Press once to choose "more". Press twice to choose "less". If no need to adjust, skip this step.
- Press [Start] button. The cooking time appears in the display window and count down.
Model NN-CS896
- Press [Auto Cook].
- Select the auto menu using the [-/+] slider bar.
Refer to your Operating Instructions for your models Auto Cook Chart.
Image varies by model.
- Press [Auto Cook] to confirm Menu selection.
Image varies by model.
- Select the weight using the [-/+] slider bar.
- Press [Start].
- Cooking starts.
Image varies by model.
- Cooking starts.
Notes for Menu 1-7:
- Fill the water tank before using.
- Do not cover foods on the auto steam programs.
- It may be necessary to wipe the excess water in the cavity after using menu 1-7.
Notes:
- When you select an automatic program symbols will appear in the display to show the cooking mode that will be used and the accessories that are needed.
- Most foods benefit from a STANDING time after cooking on an auto program, to allow heat to continue conducting to the centre.
- If the temperature of the cavity is high, auto cook feature can not be used. Display window will display “HOT”. auto cook feature can not be used until the “HOT” disappears.
- To allow for some variations that occur in food, check that food is thoroughly cooked and piping hot before serving.
- For some menus, oven will beep to ask you stir or turn over the food during the cooking.
Model NN-CS89
- To allow auto program operation, ensure the oven is in Clock mode. Select the menu option by turning the [Auto Cook] button.
- Press [▼ / ▲] to select Menu number corresponding to the food menu appears in the display Refer to your Operating Instructions for your models Auto/Sensor Cook Chart.
- Press [Start/Set] to confirm the program.
- Select the weight of the food by tapping [▼ / ▲].
- Touch [Start/Set] to confirm the weight.
- Touch [Start/Set]. After several seconds, cooking time appears in the display window and begins to count down.
Optional press [More/Less] to adjust can be done after this step. Press “▲” once to add 10 seconds or twice to add 20 seconds. Press “▼” once to subtract 10 seconds or twice to subtract 20 seconds.
Notes:
- Pop one bag at a time.
- Place bag in oven according to manufacturers’ directions.
- Start with popcorn at room temperature.
- Allow popped corn to sit unopened for a few minutes.
- Open bag carefully to prevent burns, because steam will escape.
- Do not reheat unpopped kernels or reuse bag.
- If popcorn is of a different weight than listed, follow instructions on popcorn package.
- Never leave the oven unattended.
- If popping slows to 2 to 3 seconds between pops, stop oven.
- Overcooking can burn popcorn or cause fire.
- When popping multiple bags one right after the other, the cooking time may vary slightly. This does not affect the popcorn results.
- If ‘HOT INSIDE WAIT’ appears in the display window, the oven temperature is too high from previous use and an auto program can not be set. Cooking mode and time may still be set manually.
Model NN-DS58
- Press the [Auto Cook] button until the Menu you require scrolls across the display window.
- Refer to your Operating Instructions for your models Auto Cook Chart.
- Select serving/weight by turning [Time/Weight] Dial.
- Touch [Start] once.
- Touch [Start/Set]. The cooking program will start and the time in the display will count down.
Optional press [More/Less] to adjust the time after this step. Press “▲” once to add 10 seconds or twice to add 20 seconds. Press “▼” once to subtract 10 seconds or twice to subtract 20 seconds.
Notes:
- The auto cook programs must only be used for foods described.
- Only cook foods within the weight ranges described.
- Always weigh the food rather than relying on the package weight information.
- The temperature for frozen food is assumed to be 0 °F (–18 °C) to –2 °F (–20 °C). The temperature of chilled food is assumed to be 41 °F (+5 °C) to 46 °F (+8 °C) (refrigerator temperature).
- Most foods benefit from a standing time after cooking on an auto program, to allow heat to continue conducting to the centre.
- To allow for some variations that occur in food, check that food is thoroughly cooked and piping hot before serving.
- If "HOT" appears in the display window, the oven temperature is too high from previous use and an auto program can not be set. Cooking mode and time may still be set manually.
- When you select an automatic program, symbols will appear in the display to show the cooking mode that will be used and the accessories that are needed.
Model NN-GN68
- Press the [Sensor Cook] until the number corresponding to the food menu appears in the display.
- Refer to your Operating Instructions for your models Sensor Cook Chart.
- Press the [▲/▼] to add or subtract cooking time.
- ▲ = More (Adds approx. 20% time)
▼ = Less (Subtracts approx. 20% time)
Touch More Pad or Less pad before touching Start. - Press [Start]. Cooking is complete when 5 beeps sound. (For some menus, when steam is detected by the Genius Sensor and 2 beeps sound, the remaining cooking time will appear in the display window.)
Notes
- After having used the Sensor Cook feature a few times, you may decide you would prefer your food cooked to a different doneness – that is why you would utilize the (More) or (Less) buttons.
- When steam is detected by the Genius Sensor and two beeps sound, the remaining cooking time will appear in the display.
- Automatic features are provided for your convenience. If results are not suitable to your individual preference, or if serving size is other than what is listed in the operating instructions.
For the best results with the GENIUS SENSOR, follow these recommendations.
BEFORE Reheating/Cooking:
- The room temperature surrounding the oven should be below 35 °C (95 °F).
- Food weight should exceed 110 g (4 oz.).
- Be sure the glass tray, the outside of the cooking containers and the inside of the microwave oven are dry before placing food in the oven. Residual beads of moisture turning into steam can mislead the sensor.
- Cover food with lid, or with vented plastic wrap. Never use tightly sealed plastic containers—they can prevent steam from escaping and cause food to overcook.
DURING Reheating/Cooking:
DO NOT open the oven door until beeps sound. Doing so will cause inaccurate cooking since the steam from food is no longer contained within the oven cavity. Once the cooking time begins to count down, the oven door may be opened to stir, turn or rearrange foods for some menus.
AFTER Reheating/Cooking:
All foods should have a stand time.
Model NN-GT69
- Press Sensor Reheat once, press the [Sensor Reheat] button once.
- Press [Start]. Reheating is complete when five beeps sound.
- Press [More/Less] to adjust time. Press ▲ (More) to add 20% more time than suggested. Press ▼ (Less) to subtract 20% cooking time. Press ▲ (More) or ▼(Less) before pressing Start.
- After having used the Sensor Reheat feature a few times, you may decide you would prefer your food cooked to a different doneness – that is why you would utilize the ▲ (More) or ▼ (Less) buttons.
- When steam is detected by the Genius Sensor and two beeps sound, the remaining cooking time will appear in the display.
- If the temperature of the cavity is too high, Sensor Reheat feature cannot be used.
- The message “HOT” will appears in the display window. Sensor Reheat feature can be used again when the “HOT” message disappears. Please open the door in order to cool the temperature of the cavity more quickly.
- Casseroles: Add 3 to 4 tablespoons of liquid, cover with lid or vented plastic wrap. Stir when time appears in the display window.
- Canned foods: Empty contents into casserole dish or serving bowl, cover dish with lid or vented plastic wrap. After reheating, let stand or a few minutes.
- Plate of food: Arrange food on plate; top with butter, gravy, etc. Cover with lid or vented plastic wrap. After reheating, let stand for a few minutes.
DO NOT USE SENSOR REHEAT:
- To reheat bread, meat pie and pastry products. Use manual power and time for these foods.
- For raw or uncooked foods.
- If oven cavity is warm.
- For beverages.
- For frozen foods.
Notes
- All foods, such as casseroles, plated dinners, soups, stews, pasta dishes (except lasagne) and canned foods, must be pre-cooked. Foods should be reheated from refrigerator or room temperature, do not reheat frozen foods on this setting. Do not reheat in foil or plastic containers as unsuccessful reheating times will result. All foods should be covered with vented plastic wrap or a fitting lid. Where possible after heating, stir foods and stand covered for 3 to 5 minutes before serving.
Model NN-H765, NN-H965
- Press the [Sensor Cook] button until the number with food menu appears in the display.
- Refer to your Operating Instructions for your models Auto Cook Chart.
- Press the [More/Less] to add or subtracts cooking time. Press [More/Less] before pressing Start.
1 tap = Adds approx. 10 secs.
2 taps = Adds approx. 20 secs.
3 taps = Subtracts approx. 10 secs.
4 taps = Subtracts approx. 20 secs.
5 taps = Original setting. - Press [Start]. Cooking is complete when 5 beeps sound. and 2 beeps sound, the remaining cooking time will appear in the display window.
Notes:
- After having used the Sensor Cook feature a few times, you may decide you would prefer your food cooked to a different doneness – that is why you would utilize the [Timer (More)] or [Clock (Less)] pad.
- When steam is detected by the Genius Sensor and two beeps sound, the remaining cooking time will appear in the display.
- Automatic features are provided for your convenience. If results are not suitable to your individual preference, or if serving size is other than what is listed in the operating instructions, please refer to manual cooking in the operating instructions.
For the best results with the GENIUS SENSOR, follow these recommendations:
BEFORE Reheating/Cooking:
- The room temperature surrounding the oven should be below 95 °F (35 °C).
- Food weight should exceed 4 oz. (110 g).
- Be sure the glass tray, the outside of the cooking containers and the inside of the microwave oven are dry before placing food in the oven. Residual beads of moisture turning into steam can mislead the sensor.
- Cover food with lid, or with vented plastic wrap. Never use tightly sealed plastic containers—they can prevent steam from escaping and cause food to overcook.
DURING Reheating/Cooking:
DO NOT open the oven door until two beeps sound and cooking time appears in the display. Doing so will cause inaccurate cooking since the steam from food is no longer contained within the oven cavity. Once the cooking time begins to count down, the oven door may be opened to stir, turn or rearrange foods.
AFTER Reheating/Cooking:
All foods should have a standing time.
Model NN-P295
- Press Sensor cook category button from [Potatoes/Vegetables], [Frozen Foods], [Oatmeal/Soup], [Rice/Pasta] or [Meat/Fish] repeatedly until the food menu Recipe is displayed.
- Refer to your Operating Instructions for your models Auto Cook Chart.
- Press More/Less pad before pressing Start.
- For Sensor Reheat/Cook:
Preferences for food doneness vary with each individual. After having used the Sensor Reheat/Cook feature a few times, you may decide you would prefer your food cooked to a different doneness.
- 1 tap = More (Adds Approx. 10% time)
- 2 taps = Less (Subtracts Approx. 10% time)
- 3 taps = Original setting
- Press More/Less pad before pressing Start
- Press [Start]. Cooking Starts.
Cooking is complete when 5 beeps sound. (When steam is detected by the Genius Sensor and 2 beeps sound, the remaining cooking time will appear in the display window.)
Notes
For the best results with the GENIUS SENSOR, follow these recommendations.
BEFORE Reheating/Cooking:
- The room temperature surrounding the oven should be below 35° C (95° F).
- Food weight should exceed 110 g (4 oz.).
- Be sure the glass tray, the outside of the cooking containers and the inside of the microwave oven are dry before placing food in the oven. Residual beads of moisture turning into steam can mislead the sensor.
- Cover food with lid, or with vented plastic wrap. Never use tightly sealed plastic containers—they can prevent steam from escaping and cause food to overcook.
DURING Reheating/Cooking:
DO NOT open the oven door until the end of cooking or 2 beeps sound. Doing so will cause inaccurate cooking since the steam from food is no longer contained within the oven cavity. If 2 beeps sounds, the remaining cooking time will begin to count down. The oven door may be opened to stir, turn, or rearrange foods.
AFTER Reheating/Cooking:
All foods should have a stand time
Model NN-SA651
- Press the [Auto Cook] button until the number of food category appears in the display.
- Refer to your Operating Instructions for your models Auto Cook Chart.
- Press [serving/Weight] until the Serving/weight appears in the display window.
- Press the [Quick Min] or [ Timer/Clock] button to Add or Subtract time.
- for auto reheat/cook:
Preferences for food doneness vary with each individual. After having used the auto Reheat/cook feature a few times, you may decide you would prefer your food cooked to a different doneness.
Quick Min: Adds time.
More = Adds Approx. 10% time.
Timer Clock: Subtracts time.
Less = Subtracts Approx. 10% time.
Press More/less pad before pressing Start. - Press [Start]. Cooking begins and the time will count down
Model NN-SB428, NN-SB438, NN-SB448, NN-SB458
Model NN-SB65NS
Model NN-SB658
- Press [Auto Cook] until the number corresponding to the food Menu appears in the display Refer to your Operating Instructions for your models Auto/Sensor Cook Chart.
Image varies by model.
- To select food weight press [Serving/Weight].
Image varies by model.
- Press [Start].
- Cooking is complete when five beeps sound.
Image varies by model.
- Cooking is complete when five beeps sound.
Notes:
- After having used the Auto Cook feature a few times, you may decide you would prefer your food cooked to a different doneness - that is why you would utilize the More/Less pads.
- For Steam combination models Use the +/- pads.
- Automatic features are provided for your convenience. If results are not suitable to your individual preference, or if your serving size is other than what is listed in the chart, please refer to manual cooking in the operating instructions for your model.
- BEFORE Reheating/Cooking: Cover food with lid, or with vented plastic wrap. Never use tightly sealed plastic containers - they can prevent steam from escaping and cause food to overcook.
- After Reheating/Cooking: All foods should have a standing time.
Model NN-SC64
- Press [Sensor Cook] until the number corresponding to the food menu appears in the display Refer to your Operating Instructions for your models Auto/Sensor Cook Chart.
- Press [More] to add 20% more time
than suggested.
Press [Less] to subtract 20% cooking time. - Press [Start].
- Cooking is complete when five beeps sound.
Image varies by model.
- Cooking is complete when five beeps sound.
Notes:
- After having used the Auto Cook feature a few times, you may decide you would prefer your food cooked to a different doneness - that is why you would utilize the More/Less pads.
- When steam is detected by the Sensor and two beeps sound, the remaining cooking time will appear in the display
- Automatic features are provided for your convenience. If results are not suitable to your individual preference, or if your serving size is other than what is listed in the chart, please refer to manual cooking in the operating instructions in the operating instructions for your model.
For the best results with the SENSOR, follow these recommendations:
BEFORE Reheating/Cooking:
- The roomtemperature surrounding the oven should be below 95° F (35° C).
- Food weight should exceed 4 oz.(110 g).
- Be sure the glasstray, the outside of the cooking containers and the inside of the microwave oven are dry before placing food in the oven. Residual beads of moisture turning into steam can mislead the sensor.
- Cover food with lid, or with vented plastic wrap. Never use tightly sealed plastic containers—they can prevent steam from escaping and cause food to overcook.
DURING Reheating/Cooking:
DO NOT open the oven door until two beeps sound and cooking time appears in the display. Doing so will cause inaccurate cooking since the steam from food is no longer contained within the oven cavity. Once the cooking time begins to count down, the oven door may be opened to stir, turn or rearrange foods.
AFTER Reheating/Cooking:
All foods should have a standing time
Model NN-SC67NS
Model NN-SC669, NN-SC678, NN-SC688S
Model NN-SC73LS
- Press [Sensor Cook] until the number corresponding to the food menu appears in the display Refer to your Operating Instructions for your models Auto/Sensor Cook Chart.
- Press [More] to add 20% more time
than suggested.
Press [Less] to subtract 20% cooking time. - Press [Start].
- Cooking is complete when five beeps sound.
Image varies by model.
- Cooking is complete when five beeps sound.
Notes:
- After having used the Auto Cook feature a few times, you may decide you would prefer your food cooked to a different doneness - that is why you would utilize the More/Less pads.
- When steam is detected by the Sensor and two beeps sound, the remaining cooking time will appear in the display
- Automatic features are provided for your convenience. If results are not suitable to your individual preference, or if your serving size is other than what is listed in the chart, please refer to manual cooking in the operating instructions in the operating instructions for your model.
For the best results with the SENSOR, follow these recommendations:
BEFORE Reheating/Cooking:
- The roomtemperature surrounding the oven should be below 95° F (35° C).
- Food weight should exceed 4 oz.(113 g).
- Be sure the glasstray, the outside of the cooking containers and the inside of the microwave oven are dry before placing food in the oven. Residual beads of moisture turning into steam can mislead the sensor.
- Cover food with lid, or with vented plastic wrap. Never use tightly sealed plastic containers—they can prevent steam from escaping and cause food to overcook.
DURING Reheating/Cooking:
DO NOT open the oven door until two beeps sound and cooking time appears in the display. Doing so will cause inaccurate cooking since the steam from food is no longer contained within the oven cavity. Once the cooking time begins to count down, the oven door may be opened to stir, turn or rearrange foods.
AFTER Reheating/Cooking:
All foods should have a standing time
Model NN-SD291
Model NN-SD372
- Press the [Auto Cook] button until the menu number of category appears in the display.
- Refer to your Operating Instructions for your models Auto Cook Chart.
- Rotate [Time/Weight] until the Serving/weight appears in the display window.
- Press the [More/Less] button to Add or Subtract time.
- for auto reheat/cook:
Preferences for food doneness vary with each individual. After having used the auto Reheat/cook feature a few times, you may decide you would prefer your food cooked to a different doneness.
1 tap = More (Adds Approx. 10% time).
2 taps = Less (Subtracts Approx. 10% time).
3 taps = original setting.
- Press More/less button before pressing start.
- Press [Start]. Cooking begins and the time will count down
Model NN-SD654
Model NN-SD65LS
Model NN-SD664
- Press the [Sensor Cook].
- Rotate [Sensor Menu] select Dial to select the Food category number.
- Refer to your Operating Instructions for your models Sensor Cook Chart.
- Press the [More] once to increase the cooking time by 10% or twice to increase the cooking time by 20% or press [Less] to decrease the cooking time by 10% or 20%.
- Press [Start] Dial. Cooking is complete when 5 beeps sound.
Notes:
- After having used the Sensor Cook feature a few times, you may decide you would prefer your food cooked to a different doneness – that is why you would utilize the More/Less buttons.
- When steam is detected by the Sensor, the remaining cooking time will appear in the display.
- Automatic features are provided for your convenience. If results are not suitable to your individual preference, or if serving size is other than what is listed on page 13, please refer to manual cooking in the operating instructions.
Before Reheating/Cooking:
- The room temperature surrounding the oven should be below 35 °C (95 °F).
- Food weight should exceed 110 g (4 oz.).
- Be sure the glass tray, the outside of the cooking containers and the inside of the microwave oven are dry before placing food in the oven. Residual beads of moisture turning into steam can mislead the sensor.
- Cover food with lid, or with vented plastic wrap. Never use tightly sealed plastic containers—they can prevent steam from escaping and cause food to overcook.
During Reheating/Cooking:
DO NOT open the oven door until 2 beeps sound and cooking time appears on the Display Window. Doing so will cause inaccurate cooking since the steam from food is no longer contained within the oven cavity.
Once the cooking time begins to count down, the oven door may be opened to stir, turn or rearrange foods.
After Reheating/Cooking: All foods should have a stand time.
Model NN-SD66LS, NN-SD68LS
Model NN-SD67LS, NN-SD67NS
Model NN-SD671
- Press the [Sensor Cook].
- Rotate [Sensor Menu] select Dial to select the Food category number.
- Refer to your Operating Instructions for your models Sensor Cook Chart.
- Press the [More/Less] once to increase the cooking time by 20%, twice to decrease the cooking time by 20% and 3 times to set to original setting.
- Press [Start] Dial. Cooking is complete when 5 beeps sound (When steam is detected by the Genius Sensor and 2 beeps sound, the remaining
Notes:
- After having used the Sensor Cook feature a few times, you may decide you would prefer your food cooked to a different doneness – that is why you would utilize the More/Less buttons.
- When steam is detected by the Sensor, the remaining cooking time will appear in the display.
- Automatic features are provided for your convenience. If results are not suitable to your individual preference, or if serving size is other than what is listed on page 13, please refer to manual cooking in the operating instructions.
Before Reheating/Cooking:
- The room temperature surrounding the oven should be below 35 °C (95 °F).
- Food weight should exceed 110 g (4 oz.).
- Be sure the glass tray, the outside of the cooking containers and the inside of the microwave oven are dry before placing food in the oven. Residual beads of moisture turning into steam can mislead the sensor.
- Cover food with lid, or with vented plastic wrap. Never use tightly sealed plastic containers—they can prevent steam from escaping and cause food to overcook.
During Reheating/Cooking:
DO NOT open the oven door until 2 beeps sound and cooking time appears on the Display Window. Doing so will cause inaccurate cooking since the steam from food is no longer contained within the oven cavity.
Once the cooking time begins to count down, the oven door may be opened to stir, turn or rearrange foods.
After Reheating/Cooking: All foods should have a stand time.
Model NN-SD681
Model NN-SD69LS
Model NN-SD745
Model NN-SD755, NN-SD765
Model NN-SD775
Model NN-SD78LS
Model NN-SD786, NN-SD787, NN-SD797
Model NN-SD787
Model NN-SD945
Model NN-SD962
Model NN-SD965
- Press the [Sensor Cook/Reheat].
- Rotate [Sensor Menu] select Dial to select the sensor Menu.
- Refer to your Operating Instructions for your models Sensor Cook Chart.
- Press the [More/Less] to add or subtracts cooking time.
- 1 tap = More (Adds approx. 20% time)
2 taps = Less (Subtracts approx. 20% time)
3 taps = Original setting. - Press [Start]. Cooking is complete when 5 beeps sound. (For some menus, when steam is detected by the Genius Sensor and 2 beeps sound, the remaining cooking time will appear in the display window.)
Notes
For the best results with the GENIUS SENSOR, follow these recommendations.
BEFORE Reheating/Cooking:
- The room temperature surrounding the oven should be below 35 °C (95 °F).
- Food weight should exceed 110 g (4 oz.).
- Be sure the glass tray, the outside of the cooking containers and the inside of the microwave oven are dry before placing food in the oven. Residual beads of moisture turning into steam can mislead the sensor.
- Cover food with lid, or with vented plastic wrap. Never use tightly sealed plastic containers—they can prevent steam from escaping and cause food to overcook.
DURING Reheating/Cooking:
DO NOT open the oven door until beeps sound. Doing so will cause inaccurate cooking since the steam from food is no longer contained within the oven cavity. Once the cooking time begins to count down, the oven door may be opened to stir, turn or rearrange foods for some menus.
AFTER Reheating/Cooking:
All foods should have a stand time.
Model NN-SD972
Model NN-SD975
Model NN-SD986, NN-SD987, NN-SD997
Model NN-SE284
- Press the [Sensor Menu].
- Swipe [-/+] to select the category number using the slider bar.
- Refer to your Operating Instructions for your models Sensor Cook Chart.
- Press the [▲/▼] to add or subtracts cooking time.
- 1 tap = More (Adds approx. 10% time)
2 taps = Less (Subtracts approx. 10% time)
3 taps = Original setting. - Press [Start]. Cooking is complete when 5 beeps sound. (For some menus, when steam is detected by the Genius Sensor and 2 beeps sound, the remaining cooking time will appear in the display window.)
For the best results with the GENIUS SENSOR, follow these recommendations.
BEFORE Reheating/Cooking:
- The room temperature surrounding the oven should be below 35 °C (95 °F).
- Food weight should exceed 110 g (4 oz.).
- Be sure the glass tray, the outside of the cooking containers and the inside of the microwave oven are dry before placing food in the oven. Residual beads of moisture turning into steam can mislead the sensor.
- Cover food with lid, or with vented plastic wrap. Never use tightly sealed plastic containers—they can prevent steam from escaping and cause food to overcook.
DURING Reheating/Cooking:
DO NOT open the oven door until beeps sound. Doing so will cause inaccurate cooking since the steam from food is no longer contained within the oven cavity. Once the cooking time begins to count down, the oven door may be opened to stir, turn or rearrange foods for some menus.
AFTER Reheating/Cooking:
All foods should have a stand time.
Model NN-SE785
- Press the [Sensor Reheat/Cook].
- Swipe [-/+] to select the sensor menu using the slider bar.
- Refer to your Operating Instructions for your models Sensor Cook Chart.
- Press the [▲/▼] to add or subtract cooking time.
- ▲ = More (Adds approx. 20% time)
▼ = Less (Subtracts approx. 20% time)
Touch More Pad or Less pad before touching Start. - Press [Start]. Cooking is complete when 5 beeps sound. (For some menus, when steam is detected by the Genius Sensor and 2 beeps sound, the remaining cooking time will appear in the display window.)
Notes
For the best results with the GENIUS SENSOR, follow these recommendations.
BEFORE Reheating/Cooking:
- The room temperature surrounding the oven should be below 35 °C (95 °F).
- Food weight should exceed 110 g (4 oz.).
- Be sure the glass tray, the outside of the cooking containers and the inside of the microwave oven are dry before placing food in the oven. Residual beads of moisture turning into steam can mislead the sensor.
- Cover food with lid, or with vented plastic wrap. Never use tightly sealed plastic containers—they can prevent steam from escaping and cause food to overcook.
DURING Reheating/Cooking:
DO NOT open the oven door until beeps sound. Doing so will cause inaccurate cooking since the steam from food is no longer contained within the oven cavity. Once the cooking time begins to count down, the oven door may be opened to stir, turn or rearrange foods for some menus.
AFTER Reheating/Cooking:
All foods should have a stand time.
Model NN-SE795
Model NN-SE796
- Press the [Sensor Cook/Reheat].
- Rotate the [Sensor Menu] Dial to select the Sensor Menu.
- Refer to your Operating Instructions for your models Sensor Cook Chart.
- Press the [More/Less] to add or subtracts cooking time.
- 1 tap = More (Adds approx. 20% time)
2 taps = Less (Subtracts approx. 20% time)
3 taps = Original setting. - Press [Start]. Cooking is complete when 5 beeps sound. (For some menus, when steam is detected by the Genius Sensor and 2 beeps sound, the remaining cooking time will appear in the display window.)
Notes
For the best results with the GENIUS SENSOR, follow these recommendations.
BEFORE Reheating/Cooking:
- The room temperature surrounding the oven should be below 35 °C (95 °F).
- Food weight should exceed 110 g (4 oz.).
- Be sure the glass tray, the outside of the cooking containers and the inside of the microwave oven are dry before placing food in the oven. Residual beads of moisture turning into steam can mislead the sensor.
- Cover food with lid, or with vented plastic wrap. Never use tightly sealed plastic containers—they can prevent steam from escaping and cause food to overcook.
DURING Reheating/Cooking:
DO NOT open the oven door until beeps sound. Doing so will cause inaccurate cooking since the steam from food is no longer contained within the oven cavity. Once the cooking time begins to count down, the oven door may be opened to stir, turn or rearrange foods for some menus.
AFTER Reheating/Cooking:
All foods should have a stand time.
Model NN-SE985
Model NN-SE986
Model NN-SE995
- Press the [Sensor Reheat/Cook].
- Swipe [-/+] to select the sensor menu using the slider bar.
- Refer to your Operating Instructions for your models Sensor Cook Chart.
- Press the [▲/▼] to add or subtract cooking time.
- ▲ = More (Adds approx. 20% time)
▼ = Less (Subtracts approx. 20% time)
Touch More Pad or Less pad before touching Start. - Press [Start]. Cooking is complete when 5 beeps sound. (For some menus, when steam is detected by the Genius Sensor and 2 beeps sound, the remaining cooking time will appear in the display window.)
Notes
For the best results with the GENIUS SENSOR, follow these recommendations.
BEFORE Reheating/Cooking:
- The room temperature surrounding the oven should be below 35 °C (95 °F).
- Food weight should exceed 110 g (4 oz.).
- Be sure the glass tray, the outside of the cooking containers and the inside of the microwave oven are dry before placing food in the oven. Residual beads of moisture turning into steam can mislead the sensor.
- Cover food with lid, or with vented plastic wrap. Never use tightly sealed plastic containers—they can prevent steam from escaping and cause food to overcook.
DURING Reheating/Cooking:
DO NOT open the oven door until beeps sound. Doing so will cause inaccurate cooking since the steam from food is no longer contained within the oven cavity. Once the cooking time begins to count down, the oven door may be opened to stir, turn or rearrange foods for some menus.
AFTER Reheating/Cooking:
All foods should have a stand time.
Model NN-SE996
Model NN-SG138, NN-SG158
This model uses the sensor menu to cook food automatically. Sensor Menu category Buttons are Potato, Veggies, Chicken, Fish, and Pasta Button.
- To use sensor cook using sensor food category buttons press one of the following buttons based on the food you would like to cook, [Potato], [Veggies], [Chicken], [Fish] or [Pasta].
- For Veggies button, if you press [Veggies once it is for fresh veggies and if you press [Veggies] twice it is for frozen veggies.
- Press [Start]. POTATO, CHICKEN, FISH or PASTA will display depending which button was pressed.
Notes:
- END is displayed when cooking is fimished and beeps three times.
Model NN-SG448
Model NN-SG65
- Press /Touch [Sensor Cook (1-6)] or [Sensor Cook (7-120] until the desired number/food appears in the display. Refer to the chart in the operating instructions for food list number.
- Press/Touch [Start]. Each food number/item appears in the display. Cooking is complete when three beeps sound.
Model NN-SG656S, NN-SG676
- Press the [Sensor Cook] until the number corresponding to the food menu appears in the display.
- Press [More] to add 20% more time than suggested. Press [Less] Less to subtract 20% cooking time.
- Refer to your Operating Instructions for your models Sensor Cook Chart.
- Press [Start]. Cooking is complete when 5 beeps sound.
Notes:
- After having used the Sensor Cook feature a few times, you may decide you would prefer your food cooked to a different doneness – that is why you would utilize the More/Less pads.
- When steam is detected by the Sensor and two beeps sound, the remaining cooking time will appear in the display.
- Automaticfeaturesare provided for your convenience. If results are notsuitable to your individual preference, or if serving size is otherthan what is listed on, please refer to manual cooking in the operating instructions.
- The roomtemperature surrounding the oven should be below 95° F (35° C).
- Food weight should exceed 4 oz.(110 g).
- Be sure the glasstray, the outside of the cooking containers and the inside of the microwave oven are dry before placing food in the oven. Residual beads of moisture turning into steam can mislead the sensor
- Cover food with lid, or with vented plastic wrap. Never use tightly sealed plastic containers—they can prevent steam from escaping and cause food to overcook.
For the best results with the SENSOR, follow these recommendations:
BEFORE Reheating/Cooking:
DURING Reheating/Cooking:
DO NOT open the oven door until two beeps sound and cooking time appears in the display. Doing so will cause inaccurate cooking since the steam from food is no longer contained within the oven cavity. Once the cooking time begins to count down, the oven door may be opened to stir, turn or rearrange foods.
AFTER Reheating/Cooking: All foods should have a standing time.
Model NN-SN651, NN-SN661, NN-SN671
- Press the [Sensor Cook] button until the number of food category appears in the display.
- Refer to your Operating Instructions for your models Auto Cook Chart.
- Press [serving/Weight] until the Serving/weight appears in the display window.
- Press the [Quick Min] or [ Timer/Clock] button to Add or Subtract time.
- for auto reheat/cook:
Preferences for food doneness vary with each individual. After having used the auto Reheat/cook feature a few times, you may decide you would prefer your food cooked to a different doneness.
Quick Min: Adds time.
More = Adds Approx. 10% time.
Timer Clock: Subtracts time.
Less = Subtracts Approx. 10% time.
Press More/less pad before pressing Start. - Press [Start]. Cooking begins and the time will count down
Model NN-SN65KB/KW, NN-SN66KB, NN-SN67KS
- Press the [Sensor Cook (Reheat)] repeatedly until the number corresponding to the food menu appears in the display.
- Refer to your Operating Instructions for your models Sensor Cook Chart.
- Press [Start]. Cooking is complete when 5 beeps sound.
Notes:
Notes
For the best results with the GENIUS SENSOR, follow these recommendations:
BEFORE Reheating/Cooking:
- The room temperature surrounding the oven should be below 95° F (35° C).
- Food weight should exceed 4 oz.(110 g).
- Be sure the glasstray, the outside of the cooking containers and the inside of the microwave oven are dry before placing food in the oven. Residual beads of moisture turning into steam can mislead the sensor
- Cover food with lid, or with vented plastic wrap. Never use tightly sealed plastic containers—they can prevent steam from escaping and cause food to overcook.
DURING Reheating/Cooking:
DO NOT open the oven door until two beeps sound and cooking time appears in the display. Doing so will cause inaccurate cooking since the steam from food is no longer contained within the oven cavity. Once the cooking time begins to count down, the oven door may be opened to stir, turn or rearrange foods.
AFTER Reheating/Cooking: All foods should have a standing time.
Model NN-SN67HS, NN-SN686
- Press the [Sensor Cook (Reheat)] until the number corresponding to the food menu appears in the display.
- Refer to your Operating Instructions for your models Sensor Cook Chart.
- Press [Start]. Cooking is complete when 5 beeps sound.
Notes:
- Optional pres [More/Less to adjust cooking time. Press [Timer (More)] to add 20% more time than suggested. Press Clock (Less) to subtract 20% cooking time. Press Timer (More) or Clock (Less) before pressing Start.
- After having used the Sensor Cook feature a few times, you may decide you would prefer your food cooked to a different doneness – that is why you would utilize the Timer (More) or Clock (Less) pad.
- When steam is detected by the Genius Sensor and two beeps sound, the remaining cooking time will appear in the display.
- Automatic features are provided for your convenience. If results are not suitable to your individual preference, or if serving size is other than what is in the Sensor Cook Chart, please refer to manual cooking in the operating instructions
- The room temperature surrounding the oven should be below 95° F (35° C).
- Food weight should exceed 4 oz.(110 g).
- Be sure the glasstray, the outside of the cooking containers and the inside of the microwave oven are dry before placing food in the oven. Residual beads of moisture turning into steam can mislead the sensor
- Cover food with lid, or with vented plastic wrap. Never use tightly sealed plastic containers—they can prevent steam from escaping and cause food to overcook.
For the best results with the GENIUS SENSOR, follow these recommendations:
BEFORE Reheating/Cooking:
DURING Reheating/Cooking:
DO NOT open the oven door until two beeps sound and cooking time appears in the display. Doing so will cause inaccurate cooking since the steam from food is no longer contained within the oven cavity. Once the cooking time begins to count down, the oven door may be opened to stir, turn or rearrange foods.
AFTER Reheating/Cooking: All foods should have a standing time.
Model NN-SN68
- Press the Food Menu category Button Breakfast/Entrées/Grains/Vegetables/Frozen Foods. until the food menu appears in the display.
- Refer to your Operating Instructions for your models Sensor Cook Chart.
- Press ▲ (More) to add 20% more time than suggested.
Press ▼ (Less) to subtract 20% cooking time. - Press [Start]. Cooking is complete when 5 beeps sound.
Notes:
- After having used the Sensor Cook feature a few times, you may decide you would prefer your food cooked to a different doneness – that is why you would utilize the (More/Less) Buttons.
- When steam is detected by the Genius Sensor and two beeps sound, the remaining cooking time will appear in the display.
- Automatic features are provided for your convenience. If results are not suitable to your individual preference, or if serving size is other than what is in the Sensor Cook Chart, please refer to manual cooking in the operating instructions
- The room temperature surrounding the oven should be below 95° F (35° C).
- Food weight should exceed 4 oz.(110 g).
- Be sure the glasstray, the outside of the cooking containers and the inside of the microwave oven are dry before placing food in the oven. Residual beads of moisture turning into steam can mislead the sensor
- Cover food with lid, or with vented plastic wrap. Never use tightly sealed plastic containers—they can prevent steam from escaping and cause food to overcook.
For the best results with the GENIUS SENSOR, follow these recommendations:
BEFORE Reheating/Cooking:
DURING Reheating/Cooking:
DO NOT open the oven door until two beeps sound and cooking time appears in the display. Doing so will cause inaccurate cooking since the steam from food is no longer contained within the oven cavity. Once the cooking time begins to count down, the oven door may be opened to stir, turn or rearrange foods.
AFTER Reheating/Cooking: All foods should have a standing time.
Model NN-SN733, NN-SN736
Model NN-SN744
- Press the [Sensor Cook] until the number corresponding to the food menu appears in the display.
- Refer to your Operating Instructions for your models Sensor Cook Chart.
- Press Quick Min/More to add 20% more time than suggested. Press Timer/Clock/Less to subtract 20% cooking time.
- Press [Start]. Cooking is complete when 5 beeps sound.
Notes:
- After having used the Sensor Cook feature a few times, you may decide you would prefer your food cooked to a different doneness – that is why you would utilize the (More/Less) Buttons.
- When steam is detected by the Genius Sensor and two beeps sound, the remaining cooking time will appear in the display.
- Automatic features are provided for your convenience. If results are not suitable to your individual preference, or if serving size is other than what is in the Sensor Cook Chart, please refer to manual cooking in the operating instructions
- The room temperature surrounding the oven should be below 95° F (35° C).
- Food weight should exceed 4 oz.(110 g).
- Be sure the glasstray, the outside of the cooking containers and the inside of the microwave oven are dry before placing food in the oven. Residual beads of moisture turning into steam can mislead the sensor
- Cover food with lid, or with vented plastic wrap. Never use tightly sealed plastic containers—they can prevent steam from escaping and cause food to overcook.
For the best results with the GENIUS SENSOR, follow these recommendations:
BEFORE Reheating/Cooking:
DURING Reheating/Cooking:
DO NOT open the oven door until two beeps sound and cooking time appears in the display. Doing so will cause inaccurate cooking since the steam from food is no longer contained within the oven cavity. Once the cooking time begins to count down, the oven door may be opened to stir, turn or rearrange foods.
AFTER Reheating/Cooking: All foods should have a standing time.
Model NN-SN75
- Press [Sensor Cook (Reheat)] until the number corresponding to the food menu appears in the display.
- Press [Start]. Cooking is complete when five beeps sound.
Notes
- Optional [More/Less] adjustment can be done. Press Timer (More) to add 20% more time than suggested. Press Clock (Less) to subtract 20% cooking time. Press Timer (More) or Clock (Less) before pressing Start.
- After having used the Sensor Cook feature a few times, you may decide you would prefer your food cooked to a different doneness – that is why you would utilize the Timer (More) or Clock (Less) pad.
- . When steam is detected by the Genius Sensor and two beeps sound, the remaining cooking time will appear in the display.
- Automatic features are provided for your convenience. If results are not suitable to your individual preference, or if serving size is other than what is listed on page 19, please refer to manual cooking in the operating instructions.
For the best results with the GENIUS SENSOR, follow these recommendations:
BEFORE Reheating/Cooking:
- The room temperature surrounding the oven should be below 95 °F (35 °C).
- Food weight should exceed 4 oz. (110 g).
- Be sure the glass tray, the outside of the cooking containers and the inside of the microwave oven are dry before placing food in the oven. Residual beads of moisture turning into steam can mislead the sensor.
- Cover food with lid, or with vented plastic wrap. Never use tightly sealed plastic containers—they can prevent steam from escaping and cause food to overcook.
DURING Reheating/Cooking:
DO NOT open the oven door until two beeps sound and cooking time appears in the display. Doing so will cause inaccurate cooking since the steam from food is no longer contained within the oven cavity. Once the cooking time begins to count down, the oven door may be opened to stir, turn or rearrange foods.
AFTER Reheating/Cooking:
All foods should have a standing time.
Model NN-SN76
Model NN-SN766
Model NN-SN77HS
Model NN-SN773
- Press [Sensor Cook] until the number corresponding to the food menu appears in the display Refer to your Operating Instructions for your models Auto/Sensor Cook Chart.
- Press [Quick Min (More)] Once to add aprox. 10 secs.
Press [Quick Min (More)] twice to add aprox. 20 secs. Press [Timer/Clock (Less)] once to subtract approx. 10 Secs.
Press [Timer/Clock (Less)] twice to subtract approx. 20 Secs. - Press [Start].
- Cooking is complete when five beeps sound.
Image varies by model.
- Cooking is complete when five beeps sound.
Notes:
- After having used the Auto Cook feature a few times, you may decide you would prefer your food cooked to a different doneness - that is why you would utilize the More/Less pads.
- When steam is detected by the Sensor and two beeps sound, the remaining cooking time will appear in the display
- Automatic features are provided for your convenience. If results are not suitable to your individual preference, or if your serving size is other than what is listed in the chart, please refer to manual cooking in the operating instructions in the operating instructions for your model.
For the best results with the SENSOR, follow these recommendations:
BEFORE Reheating/Cooking:
- The roomtemperature surrounding the oven should be below 95° F (35° C).
- Food weight should exceed 4 oz.(110 g).
- Be sure the glasstray, the outside of the cooking containers and the inside of the microwave oven are dry before placing food in the oven. Residual beads of moisture turning into steam can mislead the sensor.
- Cover food with lid, or with vented plastic wrap. Never use tightly sealed plastic containers—they can prevent steam from escaping and cause food to overcook.
DURING Reheating/Cooking:
DO NOT open the oven door until two beeps sound and cooking time appears in the display. Doing so will cause inaccurate cooking since the steam from food is no longer contained within the oven cavity. Once the cooking time begins to count down, the oven door may be opened to stir, turn or rearrange foods.
AFTER Reheating/Cooking:
All foods should have a standing time
Model NN-SN773
- Press the [Sensor Cook] button until the number of food category appears in the display.
- Refer to your Operating Instructions for your models Auto Cook Chart.
- Preferences for food doneness vary with each individual. After having used the Sensor Cook feature a few times, you may decide you would prefer your food cooked to a different doneness.
Press the [Quck Min (More)] button to cook longer time.
1 tap = More (Adds Approx. 10 secs.)
2 tap = More (Adds Approx. 20 secs.)
Press the [Timer Clock (Less)] button subtract cooking time. 1 taps = Less (Subtracts Approx. 10 secs.)
2 taps = Less (Subtracts Approx. 20 secs.) - Press [Start]. Cooking is complete when 5 beeps sound. (When steam is detected by the Genius Sensor and 2 beeps sound, the remaining cooking time will appear in the display window.)
For the best results with the GENIUS SENSOR, follow these recommendations:
BEFORE Reheating/Cooking:
- The room temperature surrounding the oven should be below 95 °F (35 °C).
- Food weight should exceed 4 oz. (110 g).
- Be sure the glass tray, the outside of the cooking containers and the inside of the microwave oven are dry before placing food in the oven. Residual beads of moisture turning into steam can mislead the sensor.
- Cover food with lid, or with vented plastic wrap. Never use tightly sealed plastic containers—they can prevent steam from escaping and cause food to overcook.
DURING Reheating/Cooking:
DO NOT open the oven door until two beeps sound and cooking time appears in the display. Doing so will cause inaccurate cooking since the steam from food is no longer contained within the oven cavity. Once the cooking time begins to count down, the oven door may be opened to stir, turn or rearrange foods.
AFTER Reheating/Cooking:
All foods should have a standing time.
Model NN-SN778
- Press the [Sensor Cook] button until the number of food category appears in the display.
- Refer to your Operating Instructions for your models Auto Cook Chart.
- Preferences for food doneness vary with each individual. After having used the Sensor Cook feature a few times, you may decide you would prefer your food cooked to a different doneness.
Press the [More/Less] button.
1 tap = More (Adds Approx. 10% time)
2 taps = Less (Subtracts Approx. 10% time)
3 taps = original setting. - Press [Start]. Cooking is complete when 5 beeps sound. (When steam is detected by the Genius Sensor and 2 beeps sound, the remaining cooking time will appear in the display window.)
For the best results with the GENIUS SENSOR, follow these recommendations:
BEFORE Reheating/Cooking:
- The room temperature surrounding the oven should be below 95 °F (35 °C).
- Food weight should exceed 4 oz. (110 g).
- Be sure the glass tray, the outside of the cooking containers and the inside of the microwave oven are dry before placing food in the oven. Residual beads of moisture turning into steam can mislead the sensor.
- Cover food with lid, or with vented plastic wrap. Never use tightly sealed plastic containers—they can prevent steam from escaping and cause food to overcook.
DURING Reheating/Cooking:
DO NOT open the oven door until two beeps sound and cooking time appears in the display. Doing so will cause inaccurate cooking since the steam from food is no longer contained within the oven cavity. Once the cooking time begins to count down, the oven door may be opened to stir, turn or rearrange foods.
AFTER Reheating/Cooking:
All foods should have a standing time.
Model NN-SN936, NN-SN946
Model NN-SN965
- Press the [Sensor Cook] button until the number of food category appears in the display.
- Refer to your Operating Instructions for your models Auto Cook Chart.
- Preferences for food doneness vary with each individual. After having used the Sensor Cook feature a few times, you may decide you would prefer your food cooked to a different doneness.
Press the [More] or [Less] button before Pressing Start to adjust time.
More = (Adds Approx. 20% time)
Less = (Subtracts Approx. 20% time)
- Press [Start]. Cooking is complete when 5 beeps sound. (When steam is detected by the Genius Sensor and 2 beeps sound, the remaining cooking time will appear in the display window.)
For the best results with the GENIUS SENSOR, follow these recommendations:
BEFORE Reheating/Cooking:
- The room temperature surrounding the oven should be below 95 °F (35 °C).
- Food weight should exceed 4 oz. (110 g).
- Be sure the glass tray, the outside of the cooking containers and the inside of the microwave oven are dry before placing food in the oven. Residual beads of moisture turning into steam can mislead the sensor.
- Cover food with lid, or with vented plastic wrap. Never use tightly sealed plastic containers—they can prevent steam from escaping and cause food to overcook.
DURING Reheating/Cooking:
DO NOT open the oven door until two beeps sound and cooking time appears in the display. Doing so will cause inaccurate cooking since the steam from food is no longer contained within the oven cavity. Once the cooking time begins to count down, the oven door may be opened to stir, turn or rearrange foods.
AFTER Reheating/Cooking:
All foods should have a standing time.
Model NN-SN96JS, NN-SN97JS
- Press the [Frozen Food or Sensor Cook (reheat)] button until the number of food menu appears in the display.
- Refer to your Operating Instructions for your models Auto Cook Chart.
- Press Quick 30 (More) to add 20% more time than suggested. Press Timer/Clock (Less) to subtract 20% cooking time.
More = (Adds Approx. 20% time)
Less = (Subtracts Approx. 20% time)
- Press [Start]. Cooking is complete when 5 beeps sound.
Notes:
- After having used the Sensor Cook feature a few times, you may decide you would prefer your food cooked to a different doneness – that is why you would utilize the Quick 30 (More) or Timer/Clock (Less) pad.
- When steam is detected by the Genius Sensor and two beeps sound, the remaining cooking time will appear in the display.
- Automatic features are provided for your convenience. If results are not suitable to your individual preference, or if serving size is other than what is listed in the operating instructions, please refer to manual cooking in the operating instructions.
For the best results with the GENIUS SENSOR, follow these recommendations:
BEFORE Reheating/Cooking:
- The room temperature surrounding the oven should be below 95 °F (35 °C).
- Food weight should exceed 4 oz. (110 g).
- Be sure the glass tray, the outside of the cooking containers and the inside of the microwave oven are dry before placing food in the oven. Residual beads of moisture turning into steam can mislead the sensor.
- Cover food with lid, or with vented plastic wrap. Never use tightly sealed plastic containers—they can prevent steam from escaping and cause food to overcook.
DURING Reheating/Cooking:
DO NOT open the oven door until two beeps sound and cooking time appears in the display. Doing so will cause inaccurate cooking since the steam from food is no longer contained within the oven cavity. Once the cooking time begins to count down, the oven door may be opened to stir, turn or rearrange foods.
AFTER Reheating/Cooking:
All foods should have a standing time.
Model NN-SN966
Model NN-SN97HS
- Press the [Frozen Food or Sensor Cook (reheat)] button until the number of food menu appears in the display.
- Refer to your Operating Instructions for your models Auto Cook Chart.
- Press More/Less 1 tap to add approx. 10% more time than suggested.
Press More/Less 2 taps to subtract approx. 10% cooking time.
Press More/Less 3 taps to set to original setting. - Press [Start]. Cooking is complete when 5 beeps sound.
Notes:
- After having used the Sensor Cook feature a few times, you may decide you would prefer your food cooked to a different doneness – that is why you would utilize the More/Less button.
- When steam is detected by the Genius Sensor and two beeps sound, the remaining cooking time will appear in the display.
- Automatic features are provided for your convenience. If results are not suitable to your individual preference, or if serving size is other than what is listed in the operating instructions, please refer to manual cooking in the operating instructions.
For the best results with the GENIUS SENSOR, follow these recommendations:
BEFORE Reheating/Cooking:
- The room temperature surrounding the oven should be below 95 °F (35 °C).
- Food weight should exceed 4 oz. (110 g).
- Be sure the glass tray, the outside of the cooking containers and the inside of the microwave oven are dry before placing food in the oven. Residual beads of moisture turning into steam can mislead the sensor.
- Cover food with lid, or with vented plastic wrap. Never use tightly sealed plastic containers—they can prevent steam from escaping and cause food to overcook.
DURING Reheating/Cooking:
DO NOT open the oven door until two beeps sound and cooking time appears in the display. Doing so will cause inaccurate cooking since the steam from food is no longer contained within the oven cavity. Once the cooking time begins to count down, the oven door may be opened to stir, turn or rearrange foods.
AFTER Reheating/Cooking:
All foods should have a standing time.
Model NN-SN975
- Press the [Sensor Cook] button until the number of food category appears in the display.
- Refer to your Operating Instructions for your models Auto Cook Chart.
- Preferences for food doneness vary with each individual. After having used the Sensor Cook feature a few times, you may decide you would prefer your food cooked to a different doneness.
Press the [More] or [Less] button before Pressing Start to adjust time.
More = (Adds Approx. 20% time)
Less = (Subtracts Approx. 20% time)
- Press [Start]. Cooking is complete when 5 beeps sound. (When steam is detected by the Genius Sensor and 2 beeps sound, the remaining cooking time will appear in the display window.)
For the best results with the GENIUS SENSOR, follow these recommendations:
BEFORE Reheating/Cooking:
- The room temperature surrounding the oven should be below 95 °F (35 °C).
- Food weight should exceed 4 oz. (110 g).
- Be sure the glass tray, the outside of the cooking containers and the inside of the microwave oven are dry before placing food in the oven. Residual beads of moisture turning into steam can mislead the sensor.
- Cover food with lid, or with vented plastic wrap. Never use tightly sealed plastic containers—they can prevent steam from escaping and cause food to overcook.
DURING Reheating/Cooking:
DO NOT open the oven door until two beeps sound and cooking time appears in the display. Doing so will cause inaccurate cooking since the steam from food is no longer contained within the oven cavity. Once the cooking time begins to count down, the oven door may be opened to stir, turn or rearrange foods.
AFTER Reheating/Cooking:
All foods should have a standing time.
Model NN-ST27
Model NN-ST66, NN-ST74
- Press the [Sensor Cook (reheat)] button until the food menu appears in the display.
- Refer to your Operating Instructions for your models Auto Cook Chart.
- Optional, press [More/Less] to adjust cooking time. Press [Timer (More)] to add 20% more time than suggested. Press [Clock (Less)] to subtract 20% cooking time. Press [Timer (More)] or [Clock (Less)] before pressing Start.
- Press [Start]. Cooking is complete when 5 beeps sound.
Notes:
- After having used the Sensor Cook feature a few times, you may decide you would prefer your food cooked to a different doneness – that is why you would utilize the [Timer (More)] or [Clock (Less)] pad.
- When steam is detected by the Genius Sensor and two beeps sound, the remaining cooking time will appear in the display.
- Automatic features are provided for your convenience. If results are not suitable to your individual preference, or if serving size is other than what is listed in the operating instructions, please refer to manual cooking in the operating instructions.
For the best results with the GENIUS SENSOR, follow these recommendations:
BEFORE Reheating/Cooking:
- The room temperature surrounding the oven should be below 95 °F (35 °C).
- Food weight should exceed 4 oz. (110 g).
- Be sure the glass tray, the outside of the cooking containers and the inside of the microwave oven are dry before placing food in the oven. Residual beads of moisture turning into steam can mislead the sensor.
- Cover food with lid, or with vented plastic wrap. Never use tightly sealed plastic containers—they can prevent steam from escaping and cause food to overcook.
DURING Reheating/Cooking:
DO NOT open the oven door until two beeps sound and cooking time appears in the display. Doing so will cause inaccurate cooking since the steam from food is no longer contained within the oven cavity. Once the cooking time begins to count down, the oven door may be opened to stir, turn or rearrange foods.
AFTER Reheating/Cooking:
All foods should have a standing time.
Model NN-ST663
Model NN-ST663
- Press the [Sensor Cook] button until the number of food menu appears in the display.
- Refer to your Operating Instructions for your models Sensor Cook Chart.
- Press [Quick 30 (More)] to add 20% more time than suggested. Press [Timer/Clock (Less)] to subtract 20% cooking time.
More = (Adds Approx. 20% time)
Less = (Subtracts Approx. 20% time)
- Press [Start]. Cooking is complete when 5 beeps sound.( (When steam is detected by the Genius Sensor and 2 beeps sound, the remaining cooking time will appear in the display window.
Notes:
- After having used the Sensor Cook feature a few times, you may decide you would prefer your food cooked to a different doneness – that is why you would utilize the Quick 30 (More) or Timer/Clock (Less) pad.
- When steam is detected by the Genius Sensor and two beeps sound, the remaining cooking time will appear in the display.
- Automatic features are provided for your convenience. If results are not suitable to your individual preference, or if serving size is other than what is listed in the operating instructions, please refer to manual cooking in the operating instructions.
For the best results with the GENIUS SENSOR, follow these recommendations:
BEFORE Reheating/Cooking:
- The room temperature surrounding the oven should be below 95 °F (35 °C).
- Food weight should exceed 4 oz. (110 g).
- Be sure the glass tray, the outside of the cooking containers and the inside of the microwave oven are dry before placing food in the oven. Residual beads of moisture turning into steam can mislead the sensor.
- Cover food with lid, or with vented plastic wrap. Never use tightly sealed plastic containers—they can prevent steam from escaping and cause food to overcook.
DURING Reheating/Cooking:
DO NOT open the oven door until two beeps sound and cooking time appears in the display. Doing so will cause inaccurate cooking since the steam from food is no longer contained within the oven cavity. Once the cooking time begins to count down, the oven door may be opened to stir, turn or rearrange foods.
AFTER Reheating/Cooking:
All foods should have a standing time.
Model NN-ST67KS
- Press the [Sensor Cook (reheat)] button until the number with food menu appears in the display.
- Refer to your Operating Instructions for your models Auto Cook Chart.
- Optional press [More/Less] to adjust cooking time. Press [Timer (More)] to add 20% more time than suggested. Press [Clock (Less)] to subtract 20% cooking time. Press [Timer (More)] or [Clock (Less)] before pressing Start.
- Press [Start]. Cooking is complete when 5 beeps sound.
Notes:
- After having used the Sensor Cook feature a few times, you may decide you would prefer your food cooked to a different doneness – that is why you would utilize the [Timer (More)] or [Clock (Less)] pad.
- When steam is detected by the Genius Sensor and two beeps sound, the remaining cooking time will appear in the display.
- Automatic features are provided for your convenience. If results are not suitable to your individual preference, or if serving size is other than what is listed in the operating instructions, please refer to manual cooking in the operating instructions.
For the best results with the GENIUS SENSOR, follow these recommendations:
BEFORE Reheating/Cooking:
- The room temperature surrounding the oven should be below 95 °F (35 °C).
- Food weight should exceed 4 oz. (110 g).
- Be sure the glass tray, the outside of the cooking containers and the inside of the microwave oven are dry before placing food in the oven. Residual beads of moisture turning into steam can mislead the sensor.
- Cover food with lid, or with vented plastic wrap. Never use tightly sealed plastic containers—they can prevent steam from escaping and cause food to overcook.
DURING Reheating/Cooking:
DO NOT open the oven door until two beeps sound and cooking time appears in the display. Doing so will cause inaccurate cooking since the steam from food is no longer contained within the oven cavity. Once the cooking time begins to count down, the oven door may be opened to stir, turn or rearrange foods.
AFTER Reheating/Cooking:
All foods should have a standing time.
Model NN-ST676, NN-ST696
Model NN-ST681
Model NN-ST69KS
- Press one of the food buttons [Breakfast/Entrées/Grains/Vegetables/Frozen Foods] until the number corresponding to the food menu appears in the display.
- Refer to your Operating Instructions for your models Sensor Cook Chart.
- Press the [▲/▼] to add or subtract cooking time.
- ▲ = More (Adds approx. 20% time)
▼ = Less (Subtracts approx. 20% time)
Touch More Pad or Less pad before touching Start. - Press [Start]. Cooking is complete when 5 beeps sound. (For some menus, when steam is detected by the Genius Sensor and 2 beeps sound, the remaining cooking time will appear in the display window.)
Notes
- After having used the Sensor Cook feature a few times, you may decide you would prefer your food cooked to a different doneness – that is why you would utilize the ▲ (More) or ▼ (Less) buttons.
- When steam is detected by the Genius Sensor and two beeps sound, the remaining cooking time will appear in the display.
- Automatic features are provided for your convenience. If results are not suitable to your individual preference, or if serving size is other than what is listed in the operating instructions.
For the best results with the GENIUS SENSOR, follow these recommendations.
BEFORE Reheating/Cooking:
- The room temperature surrounding the oven should be below 35 °C (95 °F).
- Food weight should exceed 110 g (4 oz.).
- Be sure the glass tray, the outside of the cooking containers and the inside of the microwave oven are dry before placing food in the oven. Residual beads of moisture turning into steam can mislead the sensor.
- Cover food with lid, or with vented plastic wrap. Never use tightly sealed plastic containers—they can prevent steam from escaping and cause food to overcook.
DURING Reheating/Cooking:
DO NOT open the oven door until beeps sound. Doing so will cause inaccurate cooking since the steam from food is no longer contained within the oven cavity. Once the cooking time begins to count down, the oven door may be opened to stir, turn or rearrange foods for some menus.
AFTER Reheating/Cooking:
All foods should have a stand time.
Model NN-ST74, NN-ST75
Model NN-ST765
Model NN-ST766
Model NN-ST77LS
- Press the [Sensor Cook (reheat)] button until the number with food menu appears in the display.
- Refer to your Operating Instructions for your models Auto Cook Chart.
- Optional press [More/Less] to adjust cooking time. Press [Timer (More)] to add 20% more time than suggested. Press [Clock (Less)] to subtract 20% cooking time. Press [Timer (More)] or [Clock (Less)] before pressing Start.
- Press [Start]. Cooking is complete when 5 beeps sound.
Notes:
- After having used the Sensor Cook feature a few times, you may decide you would prefer your food cooked to a different doneness – that is why you would utilize the [Timer (More)] or [Clock (Less)] pad.
- When steam is detected by the Genius Sensor and two beeps sound, the remaining cooking time will appear in the display.
- Automatic features are provided for your convenience. If results are not suitable to your individual preference, or if serving size is other than what is listed in the operating instructions, please refer to manual cooking in the operating instructions.
For the best results with the GENIUS SENSOR, follow these recommendations:
BEFORE Reheating/Cooking:
- The room temperature surrounding the oven should be below 95 °F (35 °C).
- Food weight should exceed 4 oz. (110 g).
- Be sure the glass tray, the outside of the cooking containers and the inside of the microwave oven are dry before placing food in the oven. Residual beads of moisture turning into steam can mislead the sensor.
- Cover food with lid, or with vented plastic wrap. Never use tightly sealed plastic containers—they can prevent steam from escaping and cause food to overcook.
DURING Reheating/Cooking:
DO NOT open the oven door until two beeps sound and cooking time appears in the display. Doing so will cause inaccurate cooking since the steam from food is no longer contained within the oven cavity. Once the cooking time begins to count down, the oven door may be opened to stir, turn or rearrange foods.
AFTER Reheating/Cooking:
All foods should have a standing time.
Model NN-ST775, NN-ST785
Model NN-ST96JS, NN-ST98JS, NN-ST99JS
- Press the [Sensor Cook (Reheat)] repeatedly until the number corresponding to the food menu appears in the display.
- Refer to your Operating Instructions for your models Sensor Cook Chart.
- Press [Start]. Cooking is complete when 5 beeps sound.
Notes:
Notes
For the best results with the GENIUS SENSOR, follow these recommendations:
BEFORE Reheating/Cooking:
- The room temperature surrounding the oven should be below 95° F (35° C).
- Food weight should exceed 4 oz.(110 g).
- Be sure the glasstray, the outside of the cooking containers and the inside of the microwave oven are dry before placing food in the oven. Residual beads of moisture turning into steam can mislead the sensor
- Cover food with lid, or with vented plastic wrap. Never use tightly sealed plastic containers—they can prevent steam from escaping and cause food to overcook.
DURING Reheating/Cooking:
DO NOT open the oven door until two beeps sound and cooking time appears in the display. Doing so will cause inaccurate cooking since the steam from food is no longer contained within the oven cavity. Once the cooking time begins to count down, the oven door may be opened to stir, turn or rearrange foods.
AFTER Reheating/Cooking: All foods should have a standing time.
Model NN-ST966
Model NN-ST975
Model NN-SU158
- Press the Sensor cook Food category buttons from the following [Popcorn/Beverage/Potato/Veggies/Frozen Entrees/Chicken/Fish/Pasta/Melt]. Press the food category button repeatedly to select your food menu or food measurement to display.
- Refer to your Operating Instructions for more information.
END is displayed when cooking is finished and beeps three times.
Model NN-SU63, NN-SU64, NN-SU65, NN-SU656
- Press the [Sensor Cook] button until the number corresponding to the food menu appears in the display.
- Refer to your Operating Instructions for your models Auto Cook Chart.
- Press [More] once to increase the cooking time by 10% or twice to increase the cooking time by 20%. In the same manner, press [Less] to decrease the cooking time by 10% or 20%.
- Press [Start]. Cooking is complete when 5 beeps sound.
Notes:
- After having used the Sensor Cook feature a few times, you may decide you would prefer your food cooked to a different doneness – that is why you would utilize the [More] or [Less] pad.
- When steam is detected by the Genius Sensor and two beeps sound, the remaining cooking time will appear in the display.
- Automatic features are provided for your convenience. If results are not suitable to your individual preference, or if serving size is other than what is listed in the operating instructions, please refer to manual cooking in the operating instructions.
For the best results with the SENSOR, follow these recommendations:
BEFORE Reheating/Cooking:
- The room temperature surrounding the oven should be below 95 °F (35 °C).
- Food weight should exceed 4 oz. (110 g).
- Be sure the glass tray, the outside of the cooking containers and the inside of the microwave oven are dry before placing food in the oven. Residual beads of moisture turning into steam can mislead the sensor.
- Cover food with lid, or with vented plastic wrap. Never use tightly sealed plastic containers—they can prevent steam from escaping and cause food to overcook.
DURING Reheating/Cooking:
DO NOT open the oven door until two beeps sound and cooking time appears in the display. Doing so will cause inaccurate cooking since the steam from food is no longer contained within the oven cavity. Once the cooking time begins to count down, the oven door may be opened to stir, turn or rearrange foods.
AFTER Reheating/Cooking:
All foods should have a standing time.
Model NN-SU65QB, NN-SU65QW, NN-SU65QS
- Press [Sensor Cook] until the number corresponding to the desired food appears in the display. Refer to Operating Manual for sensor cook chart.
- Press [More to Add approx. 20% more time.
Press Less to Subtracts approx. 20% less cooking time. - Press [
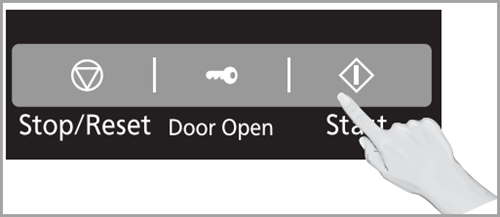 (Start)] .
- Cooking is complete when 5 beeps sound.
Notes:
- After having used the Sensor Cook feature a few times, you may decide you would prefer your food cooked to a different doneness – that is why you would utilize the More/Less pads.
- When steam is detected by the Sensor and two beeps sound, the remaining cooking time will appear in the display.
- Automatic features are
provided for your convenience.
If results are not suitable to your
individual preference, orif
serving size is other than what
is listed on page please refer
to How to manually program the power and time.
For the best results with the
SENSOR, follow these
recommendations:
BEFORE Reheating/Cooking:
- The room temperature surrounding the oven should be below 95° F (35° C).
- Food weight should exceed 4 oz. (110 g).
- Be sure the glass tray, the outside of the cooking containers and the inside of the microwave oven are dry before placing food in the oven. Residual beads of moisture turning into steam can mislead the sensor.
- Cover food with lid, or with vented plastic wrap. Never use tightly sealed plastic containers—they can prevent steam from escaping and cause food to overcook. DURING Reheating/Cooking: DO NOT open the oven door until two beeps sound and cooking time appears in the display. Doing so will cause inaccurate cooking since the steam from food is no longer contained within the oven cavity. Once the cooking time begins to count down, the oven door may be opened to stir, turn or rearrange foods. AFTER Reheating/Cooking: All foods should have a standing time.
Model NN-SU66LS NN-SU676, NN-SU696
Model NN-SU686
NN-SV79MS
You can cook food using the Sensor/Auto program.
Auto/Sensor Cook by Voice Command
- Start Voice Command by saying "Alexa, Cook X". "X" is the food name For example, “Alexa, cook Potato”. You can also say “Alexa, microwave Potato.” You don't need to mention the weight or quantity. Please refer to Auto Cooking Voice Cooking Commands food Menu Chart in the operating instructions or the Auto Cook Food Menu list sticker located in the bottom frame of the Microwave Oven when the door is opened.
Auto/Sensor Cook using Keypads and Dial.
- To allow auto program operation, ensure the oven is in Clock mode. Select the desired menu by turning the dial. For the Auto Cook Food Menu list Refer to the sticker located in the bottom frame of the Microwave Oven when the door is opened. You can also refer to the operating instructions.
- Press the [Start/Select] dial to confirm the program.
- Press [Start/Select] dial to Start. The food category will be repeated in the display window until the oven calculates the cooking time after detecting a burst of steam. Do not open the oven door until the remaining cooking time appears in the display window.
Notes:
- If desires, More/Less adjustment can be done. Turn [dial] to add or subtract the cooking time (3 levels can be select), after turning the dial within 14 seconds.
- After having used the Sensor Cook feature a few times, you may decide you would prefer your food cooked to a different doneness – that is why you would like to turning the dial.
- When steam is detected by the Genius Sensor and two beeps sound, the remaining cooking time will appear in the display.
- Automatic features are provided for your convenience. If results are not suitable to your individual preference, or if serving size is other than what is listed in the operating instructions, please refer to manual cooking section of the operating instructions.
For the best results with the GENIUS SENSOR, follow these recommendations:
BEFORE Reheating/Cooking:
DURING Reheating/Cooking:
Do Not open the oven door until two beeps sound and cooking time appears in the display. Doing so will cause inaccurate cooking since the steam from food is no longer contained within the oven cavity. Once the cooking time begins to count down, the oven door may be opened to stir, turn or rearrange foods.
AFTER Reheating/Cooking:
All foods should have a standing time.
Model NN-T945
- Press the Sensor cook Food category buttons twice from the following [Breakfast/Lunch Snack/Side Dish/Dinner]. Press the food category button repeatedly to select your food menu or food measurement to display.
- Refer to your Operating Instructions for more information.
- Preferences for food doneness vary with each individual. After having used the
Sensor Reheat/Cook feature a few times, you may decide you would prefer your food cooked to a different doneness.
1 tap = More (Adds Approx. 10% time).
2 taps = Less (Subtracts Approx. 10% time).
3 taps = original setting.
Press [More/Less] pad before pressing Start.
Cooking is complete when 5 beeps sound. (When steam is detected by the Genius Sensor and 2 beeps sound, the remaining cooking time will appear in the display window.).
Model NU-HX100
- Press the [Auto Cook].
- Rotate [Start/Select] Dial to select the Food category number.
- Refer to your Operating Instructions for your models Auto Cook Chart.
- Press the [More/Less] Pad to select more/less feature. Then rotate Start/Select Dial.The original setting will start with the middle line on the line bar flashing on the display. To increase turn to the right. To Decrease turn the dial left.
- Press [Start] Dial. Cooking is complete when 5 beeps sound.
Notes:
- After cooking, please clean the oven when it cools down.
- When you select an automatic program symbols will appear in the display to show the cooking mode that will be used.
- To allow for some variations that occur in food, check that food is thoroughly cooked and piping hot before serving.
- After cooking, verify food is done to your liking. Adjust time using Add Time feature.
Model NU-SC180
- Press [Select] button repeatedly until "Auto Menus" is highlighted.
- Press [Set] to select "Auto Menus".
- Press [◄] or [►] to select cooking menu food category. Refer to the Operating Instructions for list of food menu options.
- Press [Start/Set] button to set cooking menu number.
- Note: If you choose the 6, 8, 9, 12 menus, skip the 4th and 5th steps.
- Press [◄] or [►] to select Weight/Serving/Level.
- Note: If you choose the No.3, No.4 and No.7 menus, select level according to weight. If you choose the No.2 menu, select serving according to weight.
- Press [Start] button. The cooking time will display and count down.
Warning
Your microwave oven is a cooking appliance and you should use as much care as you use with a stove or any other cooking appliance. Do Not leave the oven unattended while in use.