Troubleshooting - Other Panasonic products respond to this remote control - Panasonic Audio Systems
When other Panasonic equipment responds to the remote control of this system, change the remote control code for this system.
For instructions on how to change the remote code select your model from the list below.
If your model number is not listed Refer to your models Operating Manual for specific procedure.
SC-AKX640
Preparation
Press the [RADIO/AUX] button to select “AUX 1” or “AUX 2”.
To set the code to “REMOTE 2”
- Press and hold [RADIO/AUX] on the main unit and the number [2] on the remote control until “REMOTE 2” is shown.
- Press and hold [OK] and the number [2] for a minimum of 4 seconds.
To set the code to “REMOTE 1”
- Press and hold [RADIO/AUX] on the main unit and the number [1] on the remote control until “REMOTE 1” is shown.
- Press and hold [OK] and the number [1] for a minimum of 4 seconds.
SC-BTX70
- Press the [BD/SD] but to select “BD/DVD”.
- While stopped, press [SETUP].
- Press Press the arrow up ▲ or down ▼ button to select “Others” and press [OK].
- Press the arrow up ▲ or down ▼ button to select
“Remote Control
Code” and press [OK]. The current setting is
displayed.
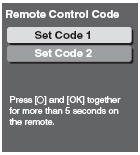
- Press the arrow up ▲ or down ▼ button to select code (1 or 2) and press [OK].
- To change the code on the remote control. While pressing [OK], press and hold the numbered button [1] or [2] for more than 5 seconds.
- Press [OK].
SC-CMAX5
Preparation
Press [AUX] to select “AUX 1” or “AUX 2”.
To set the code to “REMOTE 2”
- While pressing and holding [USB] on the unit, press and hold [AUX] on the remote control until the unit’s display shows “REMOTE 2”.
- Press and hold [OK] and [USB] on the remote control for at least 4 seconds.
To set the code to “REMOTE 1”
- While pressing and holding [USB] on the unit, press and hold [USB] on the remote control until the unit’s display shows “REMOTE 1”.
- Press and hold [OK] and the [
 ] button on the remote control for at least 4
seconds.
] button on the remote control for at least 4
seconds.
SC-HC200, SC-HC300
Preparation
Press [USB/CD] to select “CD”.
To set the code to “REMOTE 2”
- Press and hold down on the [STOP■] button on the main unit and [USB/CD] on the remote control until “REMOTE 2” is shown.
- Press and hold [OK] and [USB/CD] for a minimum of 4 seconds.
To set the code to “REMOTE 1”
- Press and hold down on the [STOP■] button on the main unit and the
button on the remote control, until
“REMOTE 1” is
shown.
- Press and hold [OK] and the button for a minimum of 4 seconds.
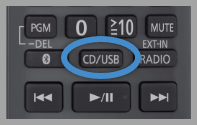
SC-HC400, SC-HC410
To set the code to “Remote 2”
- Press [CD/USB]
repeatedly to select “CD”.
- Press and hold down on the [STOP■] button on the main unit and the number [2] button on the remote control until “REMOTE 2” is shown.
- Press and hold [OK] and the number
[2] button for a
minimum of 4 seconds.
- The factory default is “Remote 1”.
- To change the mode back to “Remote 1”, repeat the steps above but replace the button pressed on the remote control from [2] to [1].
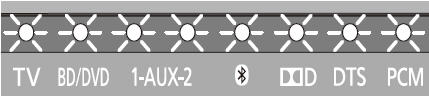
SC-HTB01
To set to Remote Control 2
- Turn off the other Panasonic audio product.
- Press and hold the [VOL - down] and [MUTE] on the remote control at the same time for 4 or more seconds.
- Confirm that all the LED indicators blink once (about
10 seconds).

- The remote control code switches to 2.
To Return the Remote Control Code to 1
- Press and hold [VOL +
Up] and [MUTE] on the remote control at
the same for 4 or more seconds.
- All the :LED indicators blink once (about 10 seconds) and the remote control code switches to 1.
SC-HTB450
Preparation
- Turn off all other Panasonic products.
- Turn on the main unit.
Change the remote control code to code "2"
- Aim the remote control at this system’s remote control sensor.
- Press and hold [MUTE] and the [
 ] buttons on the remote control for more than
4 sec.
] buttons on the remote control for more than
4 sec.
- All the indicators will blink for 10 sec when the code of this system is changed.
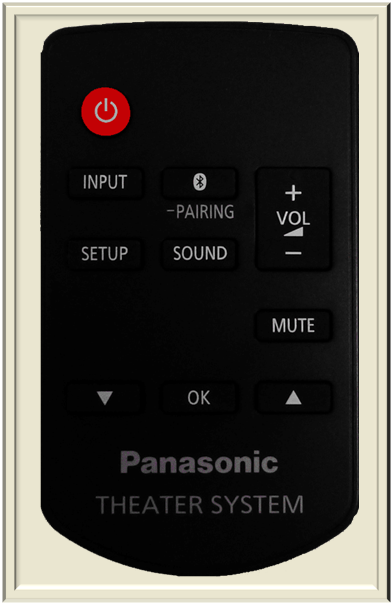
SC-HTB580
Preparation
- Turn off all other Panasonic products.
- Turn on this system.
- Aim the remote control at the remote control sensor of this system.
To Set the code to "REMOTE 2"
- Press and Hold [MUTE] and [OK] for a minimum of 4 seconds. "REMOTE 2" is shown.
To Set the code to "REMOTE 1"
- Press and hold [MUTE] and the arrrow down ▼ for a minimum of 4 seconds. "REMOTE 1" is shown.
SC-HTB70
Preparation
- Turn off all other Panasonic products.
- Turn on the main unit.
Change the remote control code to code "2"
- Aim the remote control at this system’s remote control sensor.
- Press and hold [MUTE] and the [] buttons on the remote control for more than
4 sec.
- All the indicators will blink for 10 sec when the code of this system is changed.
SC-HTB880
Preparation
- Turn off all other Panasonic products.
- Turn on this system.
- Aim the remote control at the remote control sensor of this system.
To Set the code to "REMOTE 2"
- Press and Hold [MUTE] and [OK] for a minimum of 4 seconds. "REMOTE 2" is shown.
To Set the code to "REMOTE 1"
- Press and hold [MUTE] and the arrrow down ▼ for a minimum of 4 seconds. "REMOTE 1" is shown.
SC-HTE180, SC-HTE80
Preparation
- Turn off all other Panasonic products.
- Turn on this system.
- Aim the remote control at the remote control sensor of this system.
To Set the code to "REMOTE 2"
- Press and Hold [MUTE] and [OK] for a minimum of 4 seconds. "REMOTE 2" is shown.
To Set the code to "REMOTE 1"
- Press and hold [MUTE] and the arrrow down ▼ for a minimum of 4 seconds. "REMOTE 1" is shown.
SC-MAX670
Preparation
Press [RADIO/AUX] to select “AUX 1” or “AUX 2”.
To set the code to “REMOTE 2”
- Press and hold [RADIO/EXT-IN] on the main unit and the number [2] on the remote control until “REMOTE 2” is shown.
- Press and hold [OK] and the number [2] for a minimum of 4 seconds.
To set the code to “REMOTE 1”
- Press and hold [RADIO/EXT-IN] on the main unit and the number [1] on the remote control until “REMOTE 1” is shown.
- Press and hold [OK] and the number [1] for a minimum of 4 seconds.
SC-PM270
“REMOTE 1”
The remote control and the main unit are using different codes. Change the code of the remote control.
When “REMOTE 1” is shown.
- Press and hold [OK] and [
 ] on the remote control for a minimum of 4 seconds.
“REMOTE 2”
When “REMOTE 2” is shown.
- press and hold [OK] and [USB/CD] for a minimum of 4 seconds.
SC-PM600
Preparation
Press [USB/CD] to select “CD”.
To set the code to “REMOTE 2”
- Press and hold [CD] on the main unit and [USB/CD] on the remote control. “REMOTE 2” is shown.
- Press and hold [OK] and [USB/CD] for a minimum of 4 seconds.
To set the code to “REMOTE 1”
- Press and hold [CD] on the main unit and the
[] button on the remote control. “REMOTE 1” is shown.
- Press and hold [OK] and the [ ] button for a minimum of 4 seconds.
SC-PMX150
To set the code to “Remote 2”
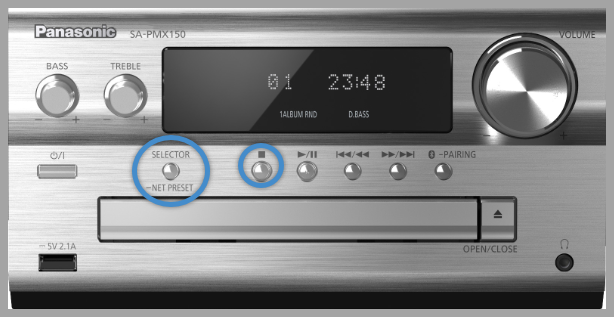
- Press the [SELECTOR] button on the main unit to select “CD”.
- Press and hold the [STOP■] button on the main unit and the number [2] on the remote control until “Remote 2” is shown.
- Press and hold [OK] and the number
[2] for a minimum
of 4 seconds.
- The factory default is “Remote 1”.
- To change the mode back to “Remote 1”, repeat the steps above but replace the button pressed on the remote control from [2] to [1].
SC-PMX80, SC-PMX90
To set the code to “Remote 2”
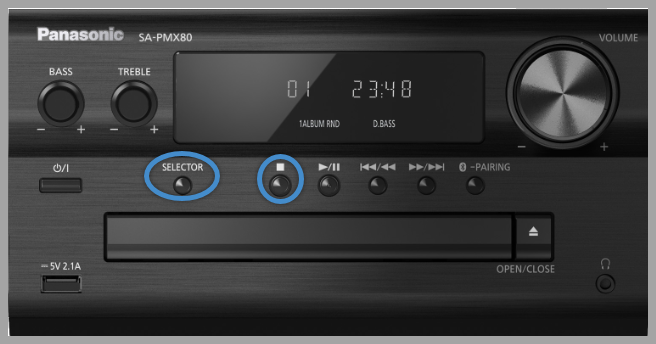
Model shown is SC-PMX80.
- Press the [SELECTOR] button on the main unit to select “CD”.
- Press and hold the [STOP■] button on the main unit and the number [2] on the remote control until “Remote 2” is shown.
- Press and hold [OK] and the number
[2] for a minimum
of 4 seconds.
- The factory default is “Remote 1”.
- To change the mode back to “Remote 1”, repeat the steps above but replace the button pressed on the remote control from [2] to [1].
SC-RS50
To set the code to “Remote 2”
- Press the [CD/] button repeatedly to select “CD”.
- Press and hold the [STOP■] button on the main unit and the number [2] on the remote control until “Remote 2” is shown.
- Press and hold [OK] and the number
[2] for a minimum
of 4 seconds.
- The factory default is “Remote 1”.
- To change the mode back to “Remote 1”, repeat the steps above but replace the button pressed on the remote control from [2] to [1].
SC-UA7
Preparation
Press [RADIO/AUX] to select “AUX 1” or “AUX 2”.
To set the code to “REMOTE 2”
- Press and hold [SELECT] on the main unit and the number [2] on the remote control until “REMOTE 2” is shown.
- Press and hold [OK] and the number [2] for a minimum of 4 seconds.
To set the code to “REMOTE 1”
- Press and hold [SELECT] on the main unit and the number [1] on the remote control until “REMOTE 1” is shown.
- Press and hold [OK] and the number [1] for a minimum of 4 seconds.
SC-UX100
Preparation
Press [USB/CD] to select “CD”.
To set the code to “REMOTE 2”
- Press and hold [USB/CD] on the main unit and [USB/CD] on the remote control. “REMOTE 2” is shown.
- Press and hold [OK] and [USB/CD] for a minimum of 4 seconds.
To set the code to “REMOTE 1”
- Press and hold [CD] on the main unit and the
[] button on the remote control. “REMOTE 1” is shown.
- Press and hold [OK] and the [ ] button for a minimum of 4 seconds.