Troubleshooting - The images from the Blu-Ray player do not appear on the TV. Picture is distorted.
An incorrect resolution is selected in “HDMI Resolution”.
The settings can be reset. For reset instructions select your
model number from the lists below. If your model is not on the
list Refer
to your models Operating Manual for specific procedure.
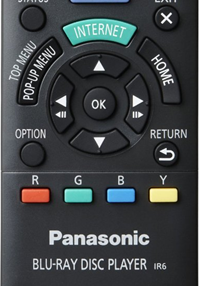
 ex. remote buttons may vary
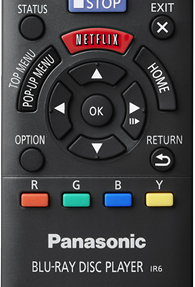
Model DMP-BD45
Possible problems;- An incorrect resolution is selected in "component Video Resolution" for models DMP-BD65, DMP-BD655, or for all other models “HDMI Resolution”. Reset the setting as follows:
- Turn the unit on.
- Press and hold [OK], the [Y - Yellow] button and the [B - Blue] button on the remote control at the same time for more than 5 seconds. “00 RET” is displayed on the unit’s display.
- Press [►Play] repeatedly on the remote control until “04PRG” is displayed on the unit’s display.
- Press and hold [OK] on the remote control
or [
 OPEN/CLOSE] on
the unit for at least 3 seconds.
OPEN/CLOSE] on
the unit for at least 3 seconds. - Set the item again.
- When Dolby Digital Plus, Dolby TrueHD, and DTS-HD audio are not output properly, select “Yes” in “Restore Default Settings” and make proper settings.
- When “3D BD-Video Playback” in the Setup menu is set to “Automatic”, images may not be output depending on the connection method. After removing the disc from this unit, select “Set before play” in the Setup menu,
- then select “2D Playback” in the setup screen displayed when playing 3D discs.
Models DMP-BD65, DMP-BD655
Possible problems;- An incorrect resolution is selected in “HDMI Resolution”. Reset the setting as follows:
- Turn the unit on.
- Press and hold [OK], the [Y - Yellow] button and the [B - Blue] button on the remote control at the same time for more than 5 seconds. “00 RET” is displayed on the unit’s display.
- Press [►Play] repeatedly on the remote control until “04PRG” is displayed on the unit’s display.
- Press and hold [OK] on the remote control
or [ OPEN/CLOSE] on
the unit for at least 3 seconds.
- Set the item again.
- When Dolby Digital Plus, Dolby TrueHD, and DTS-HD audio are not output properly, select “Yes” in “Restore Default Settings” and make proper settings.
- When “3D BD-Video Playback” in the Setup menu is set to “Automatic”, images may not be output depending on the connection method. After removing the disc from this unit, select “Set before play” in the Setup menu,
- then select “2D Playback” in the setup screen displayed when playing 3D discs.
Model Models DMP-BD77, DMP-BD87
An incorrect resolution is selected in "Component Video Resolution" or “HDMI Resolution”. Reset the setting as follows:- While the unit is on, press and hold [KEYS], [B] and
[Y] on the remote control at the same time for more than 5
seconds.
- “00 RET” is displayed on the unit’s display.
- Repeatedly press [R] on the remote control or
[
 ] on the unit until “04 PRG” is displayed on
the unit’s display.
] on the unit until “04 PRG” is displayed on
the unit’s display. - Press and hold [G] on the remote control or touch and
hold []
on the unit for at least 3 seconds. Set the item
again.
- When Dolby Digital Plus, Dolby TrueHD, and DTS-HD audio are not output in bitstream, select “Yes” in “Restore Default Settings” and make proper settings.
- for 3D models; when “3D BD-Video Playback” in the Setup menu is set to “Auto”, images may not be output depending on the connection method. After removing the disc from this unit, select “Set before play” in the Setup menu, and select “2D Playback” in the setup screen displayed when playing 3D discs.
DMP-BD79, DMP-BD89
An incorrect resolution is selected in “HDMI Resolution”. Reset the setting as follows:- Turn the unit on.
- Press and hold [OK], the yellow button and the blue
button on the remote control at the same time for more than
5 seconds.
- POWER LED and or the INFO LED starts to flash.
- Press [8] and the blue button on the remote control at the same time for more than 5 seconds.
- Set the item again.
Models DMP-BD91, DMP-BD93, DMP-BD903
An incorrect resolution is selected in “HDMI Resolution”. Reset the setting as follows:- Turn the unit on.
- Press and hold [OK], the yellow button and the blue
button on the remote control at the same time for more than
5 seconds.
- POWER LED and or the INFO LED starts to flash.
- Press [8] and the blue button on the remote control at the same time for more than 5 seconds.
- Set the item again.
Models DMP-BD94
An incorrect resolution is selected in "Component Video Resolution" or “HDMI Resolution”. Reset the setting as follows:- While the unit is on, press and hold [KEYS], [B] and
[Y] on the remote control at the same time for more than 5
seconds.
- “00 RET” is displayed on the unit’s display.
- Repeatedly press [R] on the remote control or
[] on the unit until “04 PRG” is displayed on
the unit’s display.
- Press and hold [G] on the remote control or touch and
hold []
on the unit for at least 3 seconds. Set the item
again.
- When Dolby Digital Plus, Dolby TrueHD, and DTS-HD audio are not output in bitstream, select “Yes” in “Restore Default Settings” and make proper settings.
- for 3D models; when “3D BD-Video Playback” in the Setup menu is set to “Auto”, images may not be output depending on the connection method. After removing the disc from this unit, select “Set before play” in the Setup menu, and select “2D Playback” in the setup screen displayed when playing 3D discs.
Models DMP-BBT01
An incorrect resolution is selected in “HDMI Resolution”. Reset the setting as follows:- Turn the unit on.
- Press and hold [KEYS], [B] and [Y] at the same time for more than 5 seconds.
- Status LED and INFO LED start to flash.
- Press [R] repeatedly until the CALL LED flashes.

- Press and hold [G] for more than 3 seconds. Set the item again.
- When Dolby Digital Plus, Dolby TrueHD, and DTS-HD audio are not output in bitstream, select “Yes” in “Restore Default Settings” and make proper settings.
- When “3D BD-Video Playback” in the Setup menu is set to “Auto”, images may not be output depending on the connection method. After removing the disc from this unit, select “Set before play” in the Setup menu, and select “2D Playback” in the setup screen displayed when playing 3D discs.
Model DMP-BDT110
Possible problems;- An incorrect resolution is selected in "component Video Resolution". Reset the setting as follows:
- Turn the unit on.
- Press and hold [OK], the [Y - Yellow] button and the [B - Blue] button on the remote control at the same time for more than 5 seconds. “00 RET” is displayed on the unit’s display.
- Press [►Play] repeatedly on the remote control until “04PRG” is displayed on the unit’s display.
- Press and hold [OK] for more than 5 seconds.
- Set the item again.
- When Dolby Digital Plus, Dolby TrueHD, and DTS-HD audio are not output properly, select “Yes” in “Restore Default Settings” and make proper settings.
- When “3D BD-Video Playback” in the Setup menu is set to “Automatic”, images may not be output depending on the connection method. After removing the disc from this unit, select “Set before play” in the Setup menu,
- then select “2D Playback” in the setup screen displayed when playing 3D discs.
Model DMP-BDT210
Possible problems;- An incorrect resolution is selected in "component Video Resolution". Reset the setting as follows:
- Turn the unit on.
- Press and hold [OK], the [Y - Yellow] button and the [B - Blue] button on the remote control at the same time for more than 5 seconds. “00 RET” is displayed on the unit’s display.
- Press [►Play] repeatedly on the remote control until “04PRG” is displayed on the unit’s display.
- Press and hold [OK] for more than 5 seconds.
- Set the item again.
- When Dolby Digital Plus, Dolby TrueHD, and DTS-HD audio are not output properly, select “Yes” in “Restore Default Settings” and make proper settings.
- When “3D BD-Video Playback” in the Setup menu is set to “Automatic”, images may not be output depending on the connection method. After removing the disc from this unit, select “Set before play” in the Setup menu,
- then select “2D Playback” in the setup screen displayed when playing 3D discs.
Model DMP-BDT220
Possible problems;- An incorrect resolution is selected in “HDMI Resolution”. Reset the setting as follows:
- Turn the unit on.
- Press and hold [OK], the [Y - Yellow] button and the [B - Blue] button on the remote control at the same time for more than 5 seconds. “00 RET” is displayed on the unit’s display.
- Press [►Play] repeatedly on the remote control until “04PRG” is displayed on the unit’s display.
- Press and hold [OK] for more than 5 seconds.
- Set the item again.
- When Dolby Digital Plus, Dolby TrueHD, and DTS-HD audio are not output properly, select “Yes” in “Restore Default Settings” and make proper settings.
- When “3D BD-Video Playback” in the Setup menu is set to “Auto”, images may not be output depending on the connection method. After removing the disc from this unit, select “Set before play” in the Setup menu,
- then select “2D Playback” in the setup screen displayed when playing 3D discs.
Model DMP-BDT270, DMP-BDT271
An incorrect resolution is selected in “HDMI Resolution”. Reset the setting as follows:- Turn the unit on.
- Press and hold [OK], the yellow button and the blue
button on the remote control at the same time for more than
5 seconds.
- POWER LED and or the INFO LED starts to flash.
- Press [8] and the blue button on the remote control at the same time for more than 5 seconds.
- Set the item again.
Model DMP-BDT310
Possible problems;- An incorrect resolution is selected in "component Video Resolution". Reset the setting as follows:
- Turn the unit on.
- Press and hold [OK], the [Y - Yellow] button and the [B - Blue] button on the remote control at the same time for more than 5 seconds. “00 RET” is displayed on the unit’s display.
- Press [►Play] repeatedly on the remote control until “04PRG” is displayed on the unit’s display.
- Press and hold [OK] for more than 5 seconds.
- Set the item again.
- When Dolby Digital Plus, Dolby TrueHD, and DTS-HD audio are not output properly, select “Yes” in “Restore Default Settings” and make proper settings.
- When “3D BD-Video Playback” in the Setup menu is set to “Automatic”, images may not be output depending on the connection method. After removing the disc from this unit, select “Set before play” in the Setup menu,
- then select “2D Playback” in the setup screen displayed when playing 3D discs.
Model DMP-BDT460
ex. remote buttons may vary
- Turn the unit on.
- Press and hold [OK], the [Y - Yellow] button and the [B - Blue] button on the remote control at the same time for more than 5 seconds.“00 RET” is displayed on the unit’s display.
- Press [►Play] repeatedly on the remote control until “03 VL” is displayed on the unit’s display.
- Press [OK].
Model DMP-BDT500
Possible problems;- An incorrect resolution is selected in “HDMI Resolution”. Reset the setting as follows:
- Turn the unit on.
- Press and hold [KEYS], the [Y ] button and the [B ] button on the remote control at the same time for more than 5 seconds. “00 RET” is displayed on the unit’s display.
- Press [R] repeatedly on the remote control until “04PRG” is displayed on the unit’s display.
- Press and hold [G] for more than 5 seconds.
- Set the item again.
- When Dolby Digital Plus, Dolby TrueHD, and DTS-HD audio are not output in Bitstream, select “Yes” in “Restore Default Settings” and make proper settings.
- When “3D BD-Video Playback” in the Setup menu is set to “Auto”, images may not be output depending on the connection method. After removing the disc from this unit, select “Set before play” in the Setup menu, then select “2D Playback” in the setup screen displayed when playing 3D discs.
Model DMP-UB200, DMP-UB300, DMP-UB400, DMP-UB420
Possible problems: An incorrect resolution is selected in "Resolution". Reset the setting as follows:-
-
- Turn the unit on.
- Press and hold [OK], the [Y - Yellow] button and the [B- Blue] button on the remote control at the same time for more than 5 seconds. The POWER LED starts to flash..
- Press [8] and the [B- Blue] button on the remote control at the same time for more than 5 seconds.
- Press and hold [OK] for more than 5 seconds.
- Set the item again.
- When Dolby Digital Plus, Dolby TrueHD, and DTS-HD® audio are not output properly, select “Yes” in “Restore Default Settings” and make proper settings.
-
-
-
- Turn the unit on.
- Press and hold [OK], the [Y - Yellow] button and the [B - Blue] button on the remote control at the same time for more than 5 seconds. “00 RET” is displayed on the unit’s display.
- Press [►Play] right repeatedly on the remote control until “08 FIN” is displayed on the unit’s display.
- Press and hold [OK] for more than 5 seconds
- "4K60p Output” will be set to “Off”. Make the correct setting again.
- When “3D BD-Video
Playback” in the Setup menu is set to “Auto”, images may
not be output depending on the connection method.
- After removing the disc from this unit, select “Set before play” in the Setup menu, and select “2D Playback” in the setup screen displayed when playing 3D discs.
-
-
- Use an HDMI cable that supports 18 Gbps.
Model DMP-UB900
Possible problems; An incorrect resolution is selected in 'Resolution”. Reset the setting as follows:- Turn the unit on.
- Press and hold [OK], the [Y - Yellow] button and the [B - Blue] button on the remote control at the same time for more than 5 seconds. “00 RET” is displayed on the unit’s display.
- Press [►Play] repeatedly on the remote control until “04 PRG” is displayed on the unit’s display.
- Press and hold [OK] for more than 5 seconds.
- Set the item again.
- When Dolby Digital Plus, Dolby TrueHD, and DTS-HD audio are not output properly, select “Yes” in “Restore Default Settings” and make proper settings.
- While the unit is on, press and hold [OK], the yellow button and the
blue button on the remote control at the same time for more
than 5 seconds.
- “00 RET” is displayed on the unit’s display.
- Press [►Play] repeatedly on the remote control until “13 L4K” is displayed on the unit’s display.
- Press and hold [OK] for more than 5 seconds.
- “4K60p Output” will be set to “Off”. Make the correct setting again.
- After removing the disc from this unit, select “Set before play” in the Setup menu, and select “2D Playback” in the setup screen displayed when playing 3D discs.
- DMP-UB900 - Use the supplied HDMI cable.
Model DP-UB820
Possible problems; An incorrect resolution is selected in 'Resolution”. Reset the setting as follows:- Turn the unit on.
- Press and hold [OK], the [Y - Yellow] button and the [B - Blue] button on the remote control at the same time for more than 5 seconds. “00 RET” is displayed on the unit’s display.
- Press [►Play] repeatedly on the remote control until “04 PRG” is displayed on the unit’s display.
- Press and hold [OK] for more than 5 seconds.
- Set the item again.
- When Dolby Digital Plus, Dolby TrueHD, and DTS-HD audio are not output properly, select “Yes” in “Restore Default Settings” and make proper settings.
- While the unit is on, press and hold [OK], the yellow button and the
blue button on the remote control at the same time for more
than 5 seconds.
- “00 RET” is displayed on the unit’s display.
- Press [►Play] repeatedly on the remote control until “13 L4K” is displayed on the unit’s display.
- Press and hold [OK] for more than 5 seconds.
- “4K60p Output” will be set to “Off”. Make the correct setting again.
- After removing the disc from this unit, select “Set before play” in the Setup menu, and select “2D Playback” in the setup screen displayed when playing 3D discs.
- DMP-UB820 -Possible problems;
An incorrect resolution
is selected in 'Resolution”. Reset the setting as
follows:
- Turn the unit on.
- Press and hold [OK], the [Y - Yellow] button and the [B - Blue] button on the remote control at the same time for more than 5 seconds. “00 RET” is displayed on the unit’s display.
- Press [►Play] repeatedly on the remote control until “04 PRG” is displayed on the unit’s display.
- Press and hold [OK] for more than 5 seconds.
- Set the item again.
- When Dolby Digital Plus, Dolby TrueHD, and DTS-HD audio are not output properly, select “Yes” in “Restore Default Settings” and make proper settings.
- While the unit is on, press and hold
[OK], the
yellow button and the blue button on the remote
control at the same time for more than 5 seconds.
- “00 RET” is displayed on the unit’s display.
- Press [►Play] repeatedly on the remote control until “13 L4K” is displayed on the unit’s display.
- Press and hold [OK] for more than 5 seconds.
- “4K60p Output” will be set to “Off”. Make the correct setting again.
- After removing the disc from this unit, select “Set before play” in the Setup menu, and select “2D Playback” in the setup screen displayed when playing 3D discs.
- DMP-UB900 - Use the supplied HDMI cable.
Model DP-UB9000
Possible problems; An incorrect resolution is selected in 'Resolution”. Reset the setting as follows:- Turn the unit on.
- Press and hold [OK], the [Y - Yellow] button and the [B - Blue] button on the remote control at the same time for more than 5 seconds. “00 RET” is displayed on the unit’s display.
- Press [►Play] repeatedly on the remote control until “04 PRG” is displayed on the unit’s display.
- Press and hold [OK] for more than 5 seconds.
- Set the item again.
- When Dolby Digital Plus, Dolby TrueHD, and DTS-HD audio are not output properly, select “Yes” in “Restore Default Settings” and make proper settings.
- While the unit is on, press and hold [OK], the yellow button and the
blue button on the remote control at the same time for more
than 5 seconds.
- “00 RET” is displayed on the unit’s display.
- Press [►Play] repeatedly on the remote control until “13 L4K” is displayed on the unit’s display.
- Press and hold [OK] for more than 5 seconds.
- “4K60p Output” will be set to “Off”. Make the correct setting again.
- After removing the disc from this unit, select “Set before play” in the Setup menu, and select “2D Playback” in the setup screen displayed when playing 3D discs.
- DP-UB9000 - Use an HDMI cable that supports 18 Gbps.