How to use the "Exposure Compensation" feature. - Lumix Cameras
If your model is not listed below, click here to access our Operating Manual lookup to find more information
For model DC-FZ1000M2
Applicable Shooting modes
Use this function when you cannot achieve appropriate exposure due to the difference in brightness between the subject and the background.
- Press [Exposure Bracketing] to switch to the Exposure Compensation operation.
- Rotate the rear or front dial to compensate the exposure.
- You can switch the functions between the rear dial and the front dial by pressing [DISP.]
- Press the rear dial to set.
- You can also press the shutter button halfway to set.

Exposure Compensation Screen Operations
You can perform the operations below while the exposure compensation screen is displayed.
| Action Performed | Operation Performed |
|---|---|
| Rear Dial Movement | Rotating the rear dial compensates for exposure. |
| Rotating the front dial adjust the flash output. | |
| Up and Down Arrow | Pressing the up / down arrows sets the exposure bracket. |


Notes:
- In Manual Exposure Mode, you can compensate the exposure only when the ISO sensitivity is set to [AUTO].
- You can set the exposure compensation value in the range between -5 EV and +5 EV.
- Settings can be made within a range of -3 EV to +3 EV while recording motion pictures, recording 4K photos, or recording in [Post Focus].
- When [Auto Exposure Comp.] in [Flash] in the [Rec] menu is set to [ON], the brightness of the flash will automatically be set to the level appropriate to the selected Exposure Compensation.
- When the exposure value is out of the -3EV to +3 EV range, the brightness of the recording screen will no
longer change.
- It is recommended to record by checking the actual brightness of the recorded image in the Auto Review or playback screen.
- The set Exposure Compensation value is stored even if the camera is turned off. (When [Exposure Comp.
Reset] is set to [OFF])
- To disable the saving of this value, press [MENU] → [Setup] → [Exposure Comp. Reset] → [ON]
- To enable / re-enable the saving of this value, press [MENU] → [Setup] → [Exposure Comp. Reset] → [OFF]

To view more Exposure Compensation information for this model, please click here to view the Operating Manual
For model DC-GH5
Applicable Shooting modes
Setting Exposure Compensation
Use this function when you cannot achieve appropriate exposure due to the difference in brightness between the subject and the background.
- Press [Exposure Bracketing] to switch to the Exposure Compensation operation screen.
- Rotate the rear dial to compensate the exposure.
- You can switch the functions between the rear dial and the front dial by pressing [DISP.]
- Press [Exposure Bracketing] to set.
- You can also press the shutter button halfway to set.
Notes:
- You can set the exposure compensation value in the range between -5 EV and +5 EV.
- Settings can be made within a range of -3 EV to +3 EV while recording motion pictures, recording 4K photos, or recording in [Post Focus].
- When [Auto Exposure Comp.] in [Flash] in the [Rec] menu is set to [ON], the brightness of the flash will automatically be set to the level appropriate to the selected Exposure Compensation.
- When the exposure value is out of the -3EV to +3 EV range, the brightness of the recording screen will no
longer change.
- It is recommended to record by checking the actual brightness of the recorded image in the Auto Review or playback screen.
- The set Exposure Compensation value is stored even if the camera is turned off. (When [Exposure
Comp. Reset] is set to [OFF])
- To disable the saving of this value, press [MENU] → [Setup] → [Exposure Comp. Reset] → [ON]
- To enable / re-enable the saving of this value, press [MENU] → [Setup] → [Exposure Comp. Reset] → [OFF]
To view more Exposure Compensation information for this model, please click here to view the Operating Manual
For model DC-GH5M2
Applicable Shooting modes
Use this function when you cannot achieve appropriate exposure due to the difference in brightness between the subject and the background.
- Press [Exposure Bracketing] to switch to the Exposure Compensation operation screen.
- Rotate the rear dial to compensate the exposure.
- You can switch the functions between the rear dial and the front dial by pressing [DISP.]
- Press [Exposure Bracketing] to set.
- You can also press the shutter button halfway to set.
To view more Exposure Compensation information for this model, please click here to view the Operating Manual
For model DC-GH5S
To view more Exposure Compensation information for this model, please click here to view the Operating Manual
For model DC-GH6
Applicable Shooting modes
You can compensate the exposure when the standard exposure determined by the camera is too bright or dark. You can adjust the exposure in 1/3 EV steps in a range of ±5 EV.
When recording videos, the range changes to ±3 EV.
- Press [Exposure Bracketing]
- Compensate the exposure by rotating the front dial, rear dial, or control dial.
- Confirm your selection by pressing the shutter button halfway.
To view more Exposure Compensation information for this model, please click here to view the Operating Manual
For model DC-G9
Applicable Shooting modes
Setting Exposure Compensation
Use this function when you cannot achieve appropriate exposure due to the difference in brightness between the subject and the background.
- Press [Exposure Bracketing] to switch to the Exposure Compensation operation.
- Rotate the rear dial to compensate the exposure.
- You can switch the functions between the rear dial and the front dial by pressing [DISP.]
- Press the rear dial to set.
- You can also press the shutter button halfway to set.
Exposure Compensation Screen Operations
You can perform the operations below while the exposure compensation screen is displayed.
| Action Performed | Operation Performed |
|---|---|
| Rear Dial Movement | Rotating the rear dial compensates for exposure. |
| Rotating the front dial adjust the flash output. | |
| Up and Down Arrow | Pressing the up / down arrows sets the exposure bracket. |
Notes:
- In Manual Exposure Mode, you can compensate the exposure only when the ISO sensitivity is set to [AUTO].
- You can set the exposure compensation value in the range between -5 EV and +5 EV.
- Settings can be made within a range of -3 EV to +3 EV while recording motion pictures, recording 4K / 6K photos, or recording in [Post Focus].
- When [Auto Exposure Comp.] in [Flash] in the [Rec] menu is set to [ON], the brightness of the flash will automatically be set to the level appropriate to the selected Exposure Compensation.
- When the exposure value is out of the -3EV to +3 EV range, the brightness of the recording screen will no
longer change.
- It is recommended to record by checking the actual brightness of the recorded image in the Auto Review or playback screen.
- The set Exposure Compensation value is stored even if the camera is turned off. (When [Exposure Comp.
Reset] is set to [OFF])
- To disable the saving of this value, press [MENU] → [Setup] → [Exposure Comp. Reset] → [ON]
- To enable / re-enable the saving of this value, press [MENU] → [Setup] → [Exposure Comp. Reset] → [OFF]
To view more Exposure Compensation information for this model, please click here to view the Operating Manual
For model DC-G95
Applicable Shooting modes
Setting Exposure Compensation
Use this function when you cannot achieve appropriate exposure due to the difference in brightness between the subject and the background.
- Press [Exposure Bracketing]
- Rotate the rear dial to compensate the exposure.
- You can switch the functions between the rear dial and the front dial by pressing [DISP.]
- Once you have set the exposure compensation to the desired setting using the rear or front dial, press [Exposure Bracketing] to set your exposure compensation.
- DC-G95: you can also press the shutter button halfway to set.
Notes:
- You can set the exposure compensation value in the range between -5 EV and +5 EV.
- Settings can be made within a range of -3 EV to +3 EV while recording motion pictures, recording 4K photos, or recording in [Post Focus].
- When the exposure value is out of the -3EV to +3 EV range, the brightness of the recording screen will no
longer change.
- It is recommended to record by checking the actual brightness of the recorded image in the Auto Review or playback screen.
- The set Exposure Compensation value is stored even if the camera is turned off. (When [Exposure
Comp. Reset] is set to [OFF])
- To disable the saving of this value, press [MENU] → [Setup] → [Exposure Comp. Reset] → [ON]
- To enable / re-enable the saving of this value, press [MENU] → [Setup] → [Exposure Comp. Reset] → [OFF]
To view more Exposure Compensation information for this model, please click here to view the Operating Manual
For model DC-G100
Applicable Shooting modes
Setting Exposure Compensation
Use this function when you cannot achieve appropriate exposure due to the difference in brightness between the subject and the background.
- Press [Exposure Bracketing] to switch to the Exposure Compensation operation.
- Rotate the rear dial to compensate the exposure.
- You can switch the functions between the rear dial and the front dial by pressing [DISP.]
- Press the rear dial to set.
- You can also press the shutter button halfway to set.
Exposure Compensation Screen Operations
You can perform the operations below while the exposure compensation screen is displayed.
| Action Performed | Operation Performed |
|---|---|
| Rear Dial Movement | Rotating the rear dial compensates for exposure. |
| Rotating the front dial adjust the flash output. | |
| Up and Down Arrow | Pressing the up / down arrows sets the exposure bracket. |
Notes:
- In Manual Exposure Mode, you can compensate the exposure only when the ISO sensitivity is set to [AUTO].
- You can set the exposure compensation value in the range between -5 EV and +5 EV.
- Settings can be made within a range of -3 EV to +3 EV while recording motion pictures, recording 4K / 6K photos, or recording in [Post Focus].
- When [Auto Exposure Comp.] in [Flash] in the [Rec] menu is set to [ON], the brightness of the flash will automatically be set to the level appropriate to the selected Exposure Compensation.
- When the exposure value is out of the -3EV to +3 EV range, the brightness of the recording screen will no
longer change.
- It is recommended to record by checking the actual brightness of the recorded image in the Auto Review or playback screen.
- The set Exposure Compensation value is stored even if the camera is turned off. (When [Exposure Comp.
Reset] is set to [OFF])
- To disable the saving of this value, press [MENU] → [Setup] → [Exposure Comp. Reset] → [ON]
- To enable / re-enable the saving of this value, press [MENU] → [Setup] → [Exposure Comp. Reset] → [OFF]
To view more Exposure Compensation information for this model, please click here to view the Operating Manual
For model DC-GX850
Applicable Shooting modes
Setting Exposure Compensation
Use this function when you cannot achieve appropriate exposure due to the difference in brightness between the subject and the background.
- Press [Exposure Compensation Button] to switch to the Exposure Compensation operation.
- Rotate the control dial to compensate the exposure.
- Press [MENU / SET] to set.
- You can also press the shutter button halfway to set.
Exposure Compensation Screen Operations
You can perform the operations below while the exposure compensation screen is displayed.
| Action Performed | Operation Performed |
|---|---|
| Control Dial Movement | Rotating the control dial compensates for exposure depending on the direction it is rotated. |
| ▲ / ▼ | Pressing the up / down arrows sets the exposure bracket. |

Notes:
- You can set the exposure compensation value in the range between -5 EV and +5 EV.
- Settings can be made within a range of -3 EV to +3 EV while recording motion pictures, recording 4K photos, or recording in [Post Focus].
- When [Auto Exposure Comp.] in [Flash] in the [Rec] menu is set to [ON], the brightness of the flash will automatically be set to the level appropriate to the selected Exposure Compensation.
- When the exposure value is out of the -3EV to +3 EV range, the brightness of the recording screen will no
longer change.
- It is recommended to record by checking the actual brightness of the recorded image in the Auto Review or playback screen.
- The set Exposure Compensation value is stored even if the camera is turned off. (When [Exposure Comp.
Reset] is set to [OFF])
- To disable the saving of this value, press [MENU] → [Setup] → [Exposure Comp. Reset] → [ON]
- To enable / re-enable the saving of this value, press [MENU] → [Setup] → [Exposure Comp. Reset] → [OFF]
To view more Exposure Compensation information for this model, please click here to view the Operating Manual
For model DC-GX9
Applicable Shooting modes
Use this function when you cannot achieve appropriate exposure due to the difference in brightness between the subject and the background.
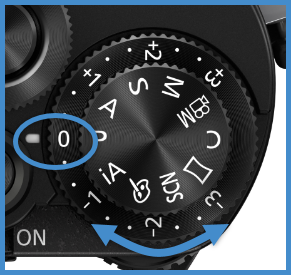
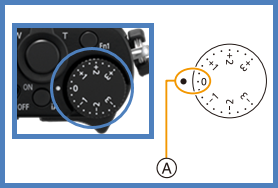
Turn the exposure compensation dial to select the compensation value.
- You can set the exposure compensation value in the range between -3 EV and +3 EV.
Extending the Exposure Compensation value (Compensating the exposure with the rear dial) Preparation Disable the Exposure Compensation dial
Press [MENU] → [Custom] → [Operation] → [Dial Set.] → [Exposure Dial] → [OFF]


- Press the rear dial to switch to Exposure Compensation operation.
- Rotate the rear dial to compensate the exposure.
- You can set the Exposure Compensation value in the range between –5 EV and +5 EV.
- You can set the Exposure Bracket by pressing ▲ / ▼.
- You can set [Flash Adjust.] by rotating the front dial.
- Press [DISP.] button to switch the operations of rear dial and front dial.
- Press the rear dial to set.
- When [Exposure Comp.] in [Dial Set.] is set to front dial [] or rear dial [], you can compensate the exposure simply by rotating the set dial in the same manner as Exposure Compensation dial operation.
 ]
or rear dial [
]
or rear dial [ ],
you can compensate the exposure simply by rotating the set dial in the same manner as Exposure Compensation
dial operation.
],
you can compensate the exposure simply by rotating the set dial in the same manner as Exposure Compensation
dial operation.Notes:
- In Manual Exposure Mode, you can correct the exposure only when the ISO sensitivity is set to [AUTO].
- Settings can be made within a range of –3 EV to +3 EV while recording motion pictures, recording 4K photos, or recording in [Post Focus].
- When [Auto Exposure Comp.] of [Flash] in the [Rec] menu is set to [ON], the flash output is also automatically adjusted based on the exposure compensation value.
- Depending on the brightness, this may not be possible in some cases.
- When the Exposure Compensation value is out of the –3 EV to +3 EV range, the brightness of the recording screen will no longer change. You can apply the exposure compensation value by pressing the shutter button halfway or pressing the [AF / AE LOCK] button to lock exposure.
- The set Exposure Compensation value is stored even if the camera is turned off. (When [Exposure Comp.
Reset] is set to [OFF])
- To disable the saving of this value, press [MENU] → [Setup] → [Exposure Comp. Reset] → [ON]
- To enable / re-enable the saving of this value, press [MENU] → [Setup] → [Exposure Comp. Reset] → [OFF]
To view more Exposure Compensation information for this model, please click here to view the Operating Manual
For model DC-LX100M2
Applicable Shooting modes
Use this function when you cannot achieve appropriate exposure due to the difference in brightness between the subject and the background.
Turn the exposure compensation dial to select the compensation value.
- With the exposure compensation dial, you can set a value in the -3 EV to +3 EV range.
Compensating the exposure over a wide range
- Set the menu to assign [Exposure Comp.] to a function button.
- Press the function button in the recording screen.
- Rotate the control dial to compensate the exposure.
- When exposure is set with a function button, you can set a value in the -5 EV to +5 EV range.
- You can set the Exposure Bracket by pressing ▲ / ▼.
- Press [MENU / SET] to set.
- You can also press the shutter button halfway to set.
Notes:
- In Manual Exposure Mode, you can compensate the exposure only when the ISO sensitivity is set to [AUTO].
- Depending on the brightness, this may not be possible in some cases.
- You can set the exposure compensation value in the range between -3 EV and +3 EV.
- It is recommended to record by checking the actual brightness of the recorded image in the Auto Review or playback screen.
- When [Auto Exposure Comp.] in [Flash] in the [Rec] menu is
set to [ON], the brightness of the flash will automatically be set to the level appropriate to
the selected Exposure Compensation.
- This applies if the exposure is set with a function button
- If you assign [Exposure Comp.] to a function button, the exposure compensation dial will be disabled.
- When the exposure value is out of the -3EV to +3 EV range, the brightness of the recording screen will no
longer change.
- It is recommended to record by checking the actual brightness of the recorded image in the Auto Review or playback screen.
- The set Exposure Compensation value is stored even if the camera is turned off. (When [Exposure Comp.
Reset] is set to [OFF])
- To disable the saving of this value, press [MENU] → [Setup] → [Exposure Comp. Reset] → [ON]
- To enable / re-enable the saving of this value, press [MENU] → [Setup] → [Exposure Comp. Reset] → [OFF]
To view more Exposure Compensation information for this model, please click here to view the Operating Manual
For models DC-S1, DC-S1H, DC-S1R, DC-S5
Applicable Recording modes
Applicable Shooting modes
You can compensate the exposure when the correct exposure determined by the camera is too bright or too dark. You can adjust the exposure in 1/3 EV steps in a range of ±5 EV. When recording videos or recording with 6K/4K Photo or Post-Focus, the range changes to ±3 EV.
- Press [Exposure Compensation].
- Compensate the exposure.
- Rotate [Front Dial], [Rear Dial] or [Control Dial] to change the exposure compensation value.
- Confirm your selection.
- Press the shutter button halfway.


Notes:
- In [M] mode, you can compensate the exposure by setting the ISO sensitivity to [AUTO].
- For models DC-S1, DC-S1R:
- When [Auto Exposure Comp.] is set to [ON], the flash output will automatically be set to the level appropriate to the exposure compensation.
- When the exposure compensation value falls below or exceeds ±3 EV, the brightness of the recording screen will no longer change. Press the shutter button halfway or use AE Lock to reflect the value on the recording screen.
- When the exposure compensation value falls below or exceeds the ±3 EV range, exposure compensation values on the status LCD are indicated as [◄ / ►].
- The set exposure compensation value is stored even if you turn off the camera. (When [Exposure Comp. Reset] is set to [OFF])
Exposure Tools for Video - DC-S1H
To view more Exposure Compensation information for DC-S1, please click here to view the Operating Manual
To view more Exposure Compensation information for DC-S1R, please click here to view the Operating Manual
To view more Exposure Compensation information for DC-S1H, please click here to view the Operating Manual
To view more Exposure Compensation information for DC-S5, please click here to view the Operating Manual
For model DC-TS7
Applicable Shooting modes
Setting Exposure Compensation
Use this function when you cannot achieve appropriate exposure due to the difference in brightness between the subject and the background.
- Press [Exposure Bracketing] to switch to the Exposure Compensation operation screen.
- Press [ ◄ / ► ] to compensate the exposure and then press [MENU / SET].
- The exposure compensation value appears on the screen.
- Select [0] to return to the original exposure.
Notes:
- You can set the exposure compensation value in the range between -5 EV and +5 EV.
- Settings can be made within a range of -3 EV to +3 EV while recording motion pictures, recording 4K photos, or recording in [Post Focus].
- When the exposure value is out of the -3EV to +3 EV range, the brightness of the recording screen will no
longer change.
- It is recommended to record by checking the actual brightness of the recorded image in the Auto Review or playback screen.
- The set Exposure Compensation value is stored even if the camera is turned off. (When [Exposure Comp.
Reset] is set to [OFF])
- To disable the saving of this value, press [MENU] → [Setup] → [Exposure Comp. Reset] → [ON]
- To enable / re-enable the saving of this value, press [MENU] → [Setup] → [Exposure Comp. Reset] → [OFF]
To view more Exposure Compensation information for this model, please click here to view the Operating Manual
For model DC-ZS80
Applicable Shooting modes
Setting Exposure Compensation
Use this function when you cannot achieve appropriate exposure due to the difference in brightness between the subject and the background.
- Press [Exposure Bracketing] (▲ on the control dial).
- Rotate the control dial to compensate the exposure.
- Rotate the control dial clockwise to adjust the exposure compensation value positively (+).
- Rotate the control dial counter-clockwise to adjust the exposure compensation value negatively (-).
- Once you have set the exposure compensation to the desired setting using the control dial, press
[MENU / SET] to set your exposure compensation.
- You can also press the shutter button halfway to set.
Notes:
- You can set the exposure compensation value in the range between -5 EV and +5 EV.
- Settings can be made within a range of -3 EV to +3 EV while recording motion pictures, recording 4K photos, or recording in [Post Focus].
- When the exposure value is out of the -3EV to +3 EV range, the brightness of the recording screen will no
longer change.
- It is recommended to record by checking the actual brightness of the recorded image in the Auto Review or playback screen.
- Depending on the brightness, exposure compensation may not be available.
- The set Exposure Compensation value is stored even if the camera is turned off. (When [Exposure
Comp. Reset] is set to [OFF])
- To disable the saving of this value, press [MENU] → [Setup] → [Exposure Comp. Reset] → [ON]
- To enable / re-enable the saving of this value, press [MENU] → [Setup] → [Exposure Comp. Reset] → [OFF]
To view more Exposure Compensation information for this model, please click here to view the Operating Manual
For model DMC-FZ1000
Applicable Shooting Modes
Use this function when you cannot achieve appropriate exposure due to the difference in brightness between the subject and the background.
- Press the rear dial to switch to Exposure Compensation operation.
- Rotate the rear dial to compensate the exposure.
- The Exposure Compensation value can be set within a range of -5 EV to +5 EV. When recording motion pictures, the Exposure Compensation value can be set within a range of -3 EV to -3 EV.
- Select [0] to return to the original exposure.
- Press the rear dial to set.
Note:
- When Auto Exposure Comp. in Flash in the Rec menu is set to ON, the brightness of the built-in flash will automatically be set to the level appropriate to the selected Exposure Compensation.
- When the exposure value is out of the -3 EV to +3 EV range, the brightness of the recording screen will no longer change. It is recommended to record by checking the actual brightness of the recorded image in the Auto Review or playback screen.
- The set Exposure Compensation value is stored even if the camera is turned off. When Exposure Comp. Reset is
set to OFF.
- Press [Menu] → [Setup] → [Exposure Comp. Reset]
To view more Exposure Compensation information for this model, please click here to view the Operating Manual
For model DMC-FZ2500
Applicable Shooting modes
Setting Exposure Compensation
Use this function when you cannot achieve appropriate exposure due to the difference in brightness between the subject and the background.
- Press [Exposure Bracketing] to switch to the Exposure Compensation operation screen.
- Rotate the rear dial to compensate the exposure.
- You can switch the functions between the rear dial and the front dial by pressing [DISP.]
- Press [Exposure Bracketing] to set.
Exposure Compensation Screen Operations
You can perform the operations below while the exposure compensation screen is displayed.
| Action Performed | Operation Performed |
|---|---|
| Rear Dial Movement | Rotating the rear dial compensates for exposure. |
| Rotating the front dial adjust the flash output. | |
| Up and Down Arrow | Pressing the up / down arrows sets the exposure bracket. |
Notes:
- You can set the exposure compensation value in the range between -5 EV and +5 EV.
- Settings can be made within a range of -3 EV to +3 EV while recording motion pictures, recording 4K photos, or recording in [Post Focus].
- When [Auto Exposure Comp.] in [Flash] in the [Rec] menu is set to [ON], the brightness of the flash will automatically be set to the level appropriate to the selected Exposure Compensation.
- When the exposure value is out of the -3EV to +3 EV range, the brightness of the recording screen will no
longer change.
- It is recommended to record by checking the actual brightness of the recorded image in the Auto Review or playback screen.
- The set Exposure Compensation value is stored even if the camera is turned off. (When [Exposure Comp.
Reset] is set to [OFF])
- To disable the saving of this value, press [MENU] → [Setup] → [Exposure Comp. Reset] → [ON]
- To enable / re-enable the saving of this value, press [MENU] → [Setup] → [Exposure Comp. Reset] → [OFF]
To view more Exposure Compensation information for this model, please click here to view the Operating Manual
For model DMC-FZ300
Applicable Modes
Corrects the exposure when there is a backlight or when the subject is too dark or too bright.
- Press [Exposure bracketing]
- Rotate the rear dial to compensate the exposure.
- You can switch the functions between the rear dial and the side dial by pressing the display button.
- When image is underexposed, adjust the exposure to the [+] direction
- When image is overexposed, adjust the exposure to the [-] direction
- Rotate the side dial to adjust the flash output.
- This operation is possible only when [Firing Mode] in [Flash] is set to [TTL].
- Flash output can also be adjusted using [Flash Adjust.] in [Flash] in the rec menu.
- Press [Exposure bracketing] to set.
- You can also press the shutter button halfway to set.

Notes:
- Depending on the brightness, this may not be possible in some cases.
- When [Auto Exposure Comp.] of [Flash] in the rec menu is set to [On], the flash output is also automatically adjusted based on the exposure compensation value.
- The set Exposure Compensation value is stored even if the camera is turned off. When [Exposure Comp. Reset] is set to [Off].
To view more Exposure Compensation information for this model, please click here to view the Operating Manual
For model DMC-GH4
Applicable Shooting modes
Setting Exposure Compensation
Use this function when you cannot achieve appropriate exposure due to the difference in brightness between the subject and the background.
- Press [Exposure Bracketing] to switch to the Exposure Compensation operation screen.
- Rotate the rear dial to compensate the exposure.
- Press [Exposure Bracketing] to set.
- You can also press the shutter button halfway to set.
Notes:
- You can set the exposure compensation value in the range between -5 EV and +5 EV.
- Settings can be made within a range of -3 EV to +3 EV while recording motion pictures, recording 4K photos, or recording in [Post Focus].
- When [Auto Exposure Comp.] in [Flash] in the [Rec] menu is set to [ON], the brightness of the flash will automatically be set to the level appropriate to the selected Exposure Compensation.
- When the exposure value is out of the -3EV to +3 EV range, the brightness of the recording screen will no
longer change.
- It is recommended to record by checking the actual brightness of the recorded image in the Auto Review or playback screen.
- The set Exposure Compensation value is stored even if the camera is turned off. (When [Exposure Comp.
Reset] is set to [OFF])
- To disable the saving of this value, press [MENU] → [Setup] → [Exposure Comp. Reset] → [ON]
- To enable / re-enable the saving of this value, press [MENU] → [Setup] → [Exposure Comp. Reset] → [OFF]
To view more Exposure Compensation information for this model, please click here to view the Operating Manual
For model DMC-G7
Applicable Shooting modes
Setting Exposure Compensation
Use this function when you cannot achieve appropriate exposure due to the difference in brightness between the subject and the background.
- Press [Exposure Bracketing] to switch to the Exposure Compensation operation.
- Rotate the rear dial to compensate the exposure.
- You can switch the functions between the rear dial and the front dial by pressing [DISP.]
- For model DMC-G7: Rotate the front dial to adjust the flash output.
- This operation is possible only when [Firing Mode] in [Flash] is set to [TTL]. Flash output can also be adjusted using [Flash Adjust.] in [Flash] in the [Rec] Menu.
- Press the rear dial to set.
- You can also press the shutter button halfway to set.
Exposure Compensation Screen Operations
You can perform the operations below while the exposure compensation screen is displayed.
| Action Performed | Operation Performed |
|---|---|
| Rear Dial Movement | Rotating the rear dial compensates for exposure. |
| Rotating the front dial adjust the flash output. | |
| Up and Down Arrow | Pressing the up / down arrows sets the exposure bracket. |
Notes:
- When [Auto Exposure Comp.] in [Flash] in the [Rec] menu is set to [ON], the brightness of the flash will automatically be set to the level appropriate to the selected Exposure Compensation.
- When the exposure value is out of the -3EV to +3 EV range, the brightness of the recording screen will no
longer change.
- It is recommended to record by checking the actual brightness of the recorded image in the Auto Review or playback screen.
- The set Exposure Compensation value is stored even if the camera is turned off. (When [Exposure Comp. Reset] is set to [OFF])
To view more Exposure Compensation information for this model, please click here to view the Operating Manual
For model DMC-G85
DMC-G85 Applicable modes
To view more Exposure Compensation information for this model, please click here to view the Operating Manual
For model DMC-GX85
Applicable Shooting modes
Setting Exposure Compensation
Use this function when you cannot achieve appropriate exposure due to the difference in brightness between the subject and the background.
- Press the rear dial to switch to the Exposure Compensation operation.
- Rotate the rear dial to compensate the exposure.
- You can switch the functions between the rear dial and the front dial by pressing [DISP.]
- Press the rear dial to set.
Exposure Compensation Screen Operations
You can perform the operations below while the exposure compensation screen is displayed.
| Action Performed | Operation Performed |
|---|---|
| Rear Dial Movement | Rotating the rear dial compensates for exposure. |
| Rotating the front dial adjust the flash output. | |
| Up and Down Arrow | Pressing the up / down arrows sets the exposure bracket. |
Notes:
- You can set the exposure compensation value in the range between -5 EV and +5 EV.
- Settings can be made within a range of -3 EV to +3 EV while recording motion pictures, recording 4K photos, or recording in [Post Focus].
- When [Auto Exposure Comp.] in [Flash] in the [Rec] menu is set to [ON], the brightness of the flash will automatically be set to the level appropriate to the selected Exposure Compensation.
- When the exposure value is out of the -3EV to +3 EV range, the brightness of the recording screen will no
longer change.
- It is recommended to record by checking the actual brightness of the recorded image in the Auto Review or playback screen.
- The set Exposure Compensation value is stored even if the camera is turned off. (When [Exposure Comp.
Reset] is set to [OFF])
- To disable the saving of this value, press [MENU] → [Setup] → [Exposure Comp. Reset] → [ON]
- To enable / re-enable the saving of this value, press [MENU] → [Setup] → [Exposure Comp. Reset] → [OFF]
To view more Exposure Compensation information for this model, please click here to view the Operating Manual
For model DMC-LX100
Applicable Shooting modes
Exposure Compensation corrects the exposure when there is a backlight or when the subject is too dark or too bright. To select the exposure compensation value, turn the exposure compensation dial.
Note:
- You can set the exposure compensation value in the range between -3 EV and +3 EV.
- Depending on the brightness, this may not be possible in some cases.
- When [Auto Exposure Comp.] of [Flash] in the [Rec] menu is
set to [ON], the flash output is also automatically adjusted based on the exposure compensation
value.
- Press [MENU] → [Rec] → [Flash] → [Auto Exposure Comp.]

To view more Exposure Compensation information for this model, please click here to view the Operating Manual
For model DMC-ZS50
Applicable Shooting modes
Corrects the exposure when there is a backlight or when the subject is too dark or too bright.
- Press [] (▲).
- Turn the control ring or control dial to select the compensation value and press [MENU /
SET].
- If the picture is too dark, adjust the exposure to the positive direction.
- If the picture is too bright, adjust the exposure to the negative direction.
- After exposure adjustment, the adjustment value ([-1] for example) is displayed in the bottom-left corner of the screen.
- You can also press ◄ / ► to make adjustments.
 ] (▲).
Notes:
- Depending on the brightness, this may not be possible in some cases.
- f you set [Exposure Comp. Reset] to [ON] in the [Setup] menu, the exposure compensation setting is reset when the camera is turned off or the recording mode is changed.
- Cannot be set in the [Starry Sky] Scene Mode
- You can adjust the brightness in the following cases:
- [Intelligent Auto Plus] Mode
- [Creative Control] Mode
- [Panorama Shot] Mode
To view more Exposure Compensation information for this model, please click here to view the Operating Manual
For model DMC-ZS60
Applicable Shooting modes
To view more Exposure Compensation information for this model, please click here to view the Operating Manual
For model DMC-ZS100
Applicable Shooting modes
Setting Exposure Compensation
Use this function when you cannot achieve appropriate exposure due to the difference in brightness between the subject and the background.
- Press [Exposure Bracketing] to switch to the Exposure Compensation operation screen.
- Rotate the rear dial to compensate the exposure.
- Press [MENU / SET] to set.
- You can also press the shutter button halfway to set.
| Action | Operation |
|---|---|
| Operation Dial Rotating Counter Clockwise | Adjust the exposure value positively. |
| Operation Dial Rotating Clockwise | Adjust the exposure value negatively. |
Notes:
- You can set the exposure compensation value in the range between -5 EV and +5 EV.
- Settings can be made within a range of -3 EV to +3 EV while recording motion pictures, recording 4K photos, or recording in [Post Focus].
- Depending on the brightness, this may not be possible in some cases.
- The set Exposure Compensation value is stored even if the camera is turned off. (When [Exposure Comp.
Reset] is set to [OFF])
- To disable the saving of this value, press [MENU] → [Setup] → [Exposure Comp. Reset] → [ON]
- To enable / re-enable the saving of this value, press [MENU] → [Setup] → [Exposure Comp. Reset] → [OFF]
To view more Exposure Compensation information for this model, please click here to view the Operating Manual